
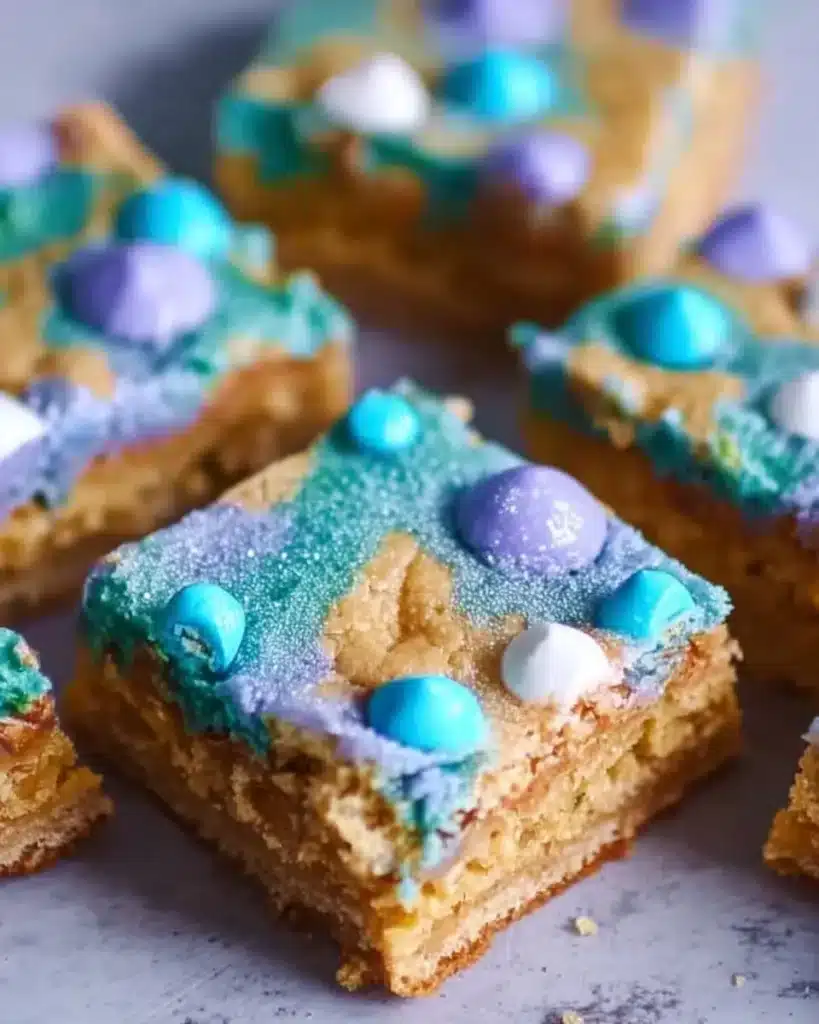
Mermaid Cookie Bars Recipe
These delightful Mermaid Cookie Bars are not just a feast for the eyes; they’re a delicious combination of soft, chewy cookie goodness with a hint of the ocean. Perfect for everyday snacking or a fun dessert, these colorful treats are super easy to make and will have everyone asking for seconds!
Why You’ll Love This Recipe
- Quick and Easy: Whip them up in no time for surprise guests or a fun family treat.
- Colorful Fun: The bright colors make these bars as much a treat for the eyes as they are for the taste buds.
- Customizable: Add your favorite mix-ins like chocolate chips, nuts, or dried fruit to make them your own!
- Kid-Friendly: Perfect for getting little ones involved in the kitchen. Who doesn’t love a sweet baking project?
- Great for Sharing: Cut them into squares for easy portioning. They make fantastic gifts or party snacks.
- Soft and Chewy Texture: Each bite combines crispy edges with a soft, gooey center, creating the perfect cookie experience.
Ingredients
- All-purpose flour: This forms the base of your cookie bars. It’s what gives them that lovely structure!
- Sugar: For sweetness! You could use brown sugar for a richer flavor, or a mix of both sugars for depth.
- Butter: Adds richness and helps create that chewy texture. Feel free to use unsalted butter, but keep in mind the salt levels.
- Eggs: They provide moisture and help bind your batter together. You can substitute flax eggs for a vegan option!
- Baking powder: Gives the bars a lovely rise. If you don’t have any, you can skip it, but they won’t be as fluffy.
- Vanilla extract: Adds a warm, sweet flavor. Always go for pure vanilla extract when you can for the best results.
- Food coloring: For that magical mermaid touch! Use any gel or liquid coloring to create shades of your liking.
- Sprinkles or edible glitter: Totally optional but a fun way to make your bars sparkle like the ocean!
Full measurements are in the recipe card below.
How to Make the Recipe
-
Preheat Your Oven: Start by preheating your oven to 350°F (175°C) and line a baking dish with parchment paper for easy removal.
-
Mix the Wet Ingredients: In a large bowl, cream together the softened butter and sugar until light and fluffy. This usually takes about 2-3 minutes with a hand mixer or stand mixer.
-
Add the Eggs and Vanilla: Beat in the eggs one at a time, followed by the vanilla extract, mixing well after each addition.
-
Combine the Dry Ingredients: In another bowl, whisk together the flour and baking powder. Gradually stir this into the wet mixture until just combined.
-
Color the Dough: Divide the dough into portions and add food coloring to each one, mixing until you achieve your desired shades.
-
Layer and Swirl: Drop spoonfuls of colored dough into your prepared baking dish. Use a knife or a skewer to swirl the colors together for a marbled effect.
-
Sprinkle and Bake: Top with sprinkles or edible glitter if desired, then pop the dish into the oven. Bake for about 20-25 minutes or until they’re golden and a toothpick comes out clean.
-
Cool and Cut: Once baked, let them cool in the dish for about 10 minutes before transferring to a wire rack. Once cooled completely, cut into squares and serve.
Pro Tips for Making the Recipe
- Room Temperature Ingredients: Make sure your eggs and butter are at room temperature for a smoother batter.
- Don’t Overmix: When mixing in the flour, mix just until combined to avoid tough bars.
- Use Parchment Paper: This helps in easy removal and prevents sticking, making your cleanup a breeze.
- Taste and Adjust: Feel free to taste the dough (carefully, since it’s raw) before baking. You can adjust sweetness or add a pinch of salt if needed.
- Double the Batch: These bars are so delicious you might want to make a double batch to share with friends and family!
How to Serve
These Mermaid Cookie Bars are delightful on their own but can be even more fun with a scoop of vanilla ice cream on the side! You can also drizzle some melted chocolate over them for extra indulgence or serve them with fresh fruit for a pop of freshness.
Make Ahead and Storage
- Fridge Storage: Store any leftover bars in an airtight container in the fridge for up to a week.
- Freezing: You can freeze these cookie bars (wrapped individually) for up to three months. Just thaw them out in the fridge overnight when you’re ready to enjoy.
- Reheating Tips: For a warm treat, pop them in the microwave for about 10-15 seconds, or enjoy them cold for a refreshing bite.
FAQs
Can I make these gluten-free?
Yes, you can substitute the all-purpose flour with a gluten-free flour blend!
How can I make them dairy-free?
Use vegan butter and substitute the eggs with flax eggs or a commercial egg replacer.
What’s the best way to measure flour?
To ensure accuracy, spoon the flour into your measuring cup and level it off with a knife, rather than scooping directly from the bag.
Can I add nuts or chocolate chips?
Absolutely! Feel free to fold in your favorite mix-ins before baking for extra flavor and texture.
Get ready to whip up a batch of these fun Mermaid Cookie Bars and dive into an ocean of sweetness! Happy baking!
Mermaid Cookie Bars
Ingredients
Method
- Preheat your oven to 350°F (175°C) and line a baking dish with parchment paper.
- In a large bowl, cream together the softened butter and sugar until light and fluffy (2-3 minutes).
- Beat in the eggs one at a time, followed by the vanilla extract.
- In another bowl, whisk together the flour and baking powder, then gradually stir this into the wet mixture until just combined.
- Divide the dough into portions and add food coloring to each, mixing until you achieve your desired shades.
- Drop spoonfuls of colored dough into the prepared baking dish and use a knife to swirl the colors together.
- Top with sprinkles or edible glitter if desired, then bake for about 20-25 minutes, or until golden.
- Let cool for 10 minutes in the dish before transferring to a wire rack.
- Once completely cooled, cut into squares and serve.