Ingredients
Equipment
Method
Prepare Your Starter (The Day Before Baking)
- Feed your gluten-free sourdough starter 8-12 hours before you plan to mix your dough. It should be very active, bubbly, and float when a small spoonful is dropped into water.
Mix the Dough (Evening of Day 1)
- In a large mixing bowl, combine the warm water and the active gluten-free sourdough starter. Mix with a whisk until the starter is mostly dissolved and well-incorporated into the water.
- In a separate bowl, whisk together the brown rice flour, sorghum flour, tapioca starch, psyllium husk powder, and fine sea salt until thoroughly combined.
- Add the dry ingredients to the wet ingredients. Using a sturdy spoon or your hands, mix until no dry streaks of flour remain and a shaggy dough forms. It will be thick and sticky. Cover the bowl with a damp cloth or plastic wrap and let it rest for 30 minutes (autolyse).
Bulk Fermentation (Over 2-3 Hours)
- Perform the first set of 'stretch and folds'. Dampen your hands slightly, grab a portion of the dough from one side, stretch it upwards, and fold it over to the opposite side of the bowl. Rotate the bowl and repeat this 4-6 times until all sides have been stretched and folded. The dough will start to gain some elasticity. Cover and rest for 30-45 minutes.
- Repeat the stretch and fold process three more times, resting the dough for 30-45 minutes between each set. After 3-4 sets, the dough should feel smoother, more cohesive, and slightly more elastic. The total bulk fermentation time will be approximately 2.5-3 hours, depending on your kitchen temperature.
Preshape and Bench Rest
- Lightly dust your work surface with rice flour. Gently scrape the dough out of the bowl onto the floured surface. Gently shape it into a loose round using your dough scraper and hands. Be careful not to degas it too much. Cover with the bowl or a damp cloth and let it rest for 20 minutes.
Final Shape and Cold Proof (Overnight)
- Generously dust your banneton with rice flour. Flour your hands and gently reshape the dough into a taut ball. Flour the top of the dough, then carefully flip it into the prepared banneton, seam-side up. Dust the top of the dough (which will be the bottom of the loaf) with more rice flour.
- Cover the banneton tightly with a plastic bag or plastic wrap and refrigerate for 12-18 hours. This slow cold proof develops flavor and makes the dough easier to handle and score.
Bake the Bread (Morning of Day 2)
- Preheat your oven to 450°F (230°C) with your Dutch oven inside for at least 45-60 minutes. The Dutch oven needs to be thoroughly heated.
- Carefully remove the hot Dutch oven from the oven. Gently invert the dough from the banneton onto a piece of parchment paper. Using a lame or sharp razor blade, score the top of the dough. A simple cross or a single ear score works well.
- Carefully lift the dough by the parchment paper and transfer it into the hot Dutch oven. Place the lid on the Dutch oven and bake for 30 minutes.
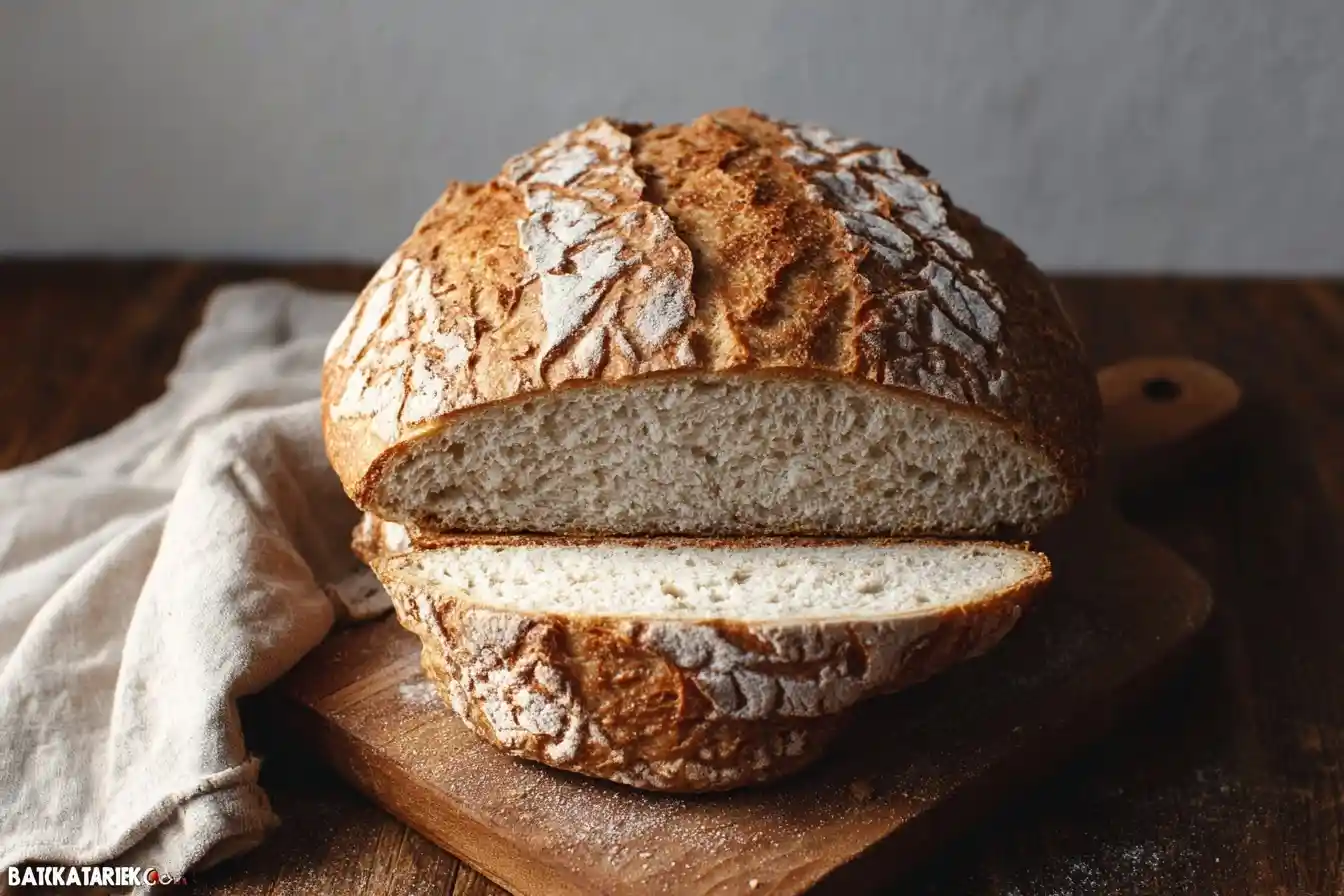
- After 30 minutes, carefully remove the lid from the Dutch oven. Reduce the oven temperature to 400°F (200°C) and continue to bake for another 35-40 minutes, or until the crust is deeply golden brown and sounds hollow when tapped on the bottom. If the crust is browning too quickly, you can tent it loosely with foil.
- Carefully remove the loaf from the Dutch oven and transfer it to a wire cooling rack. Allow the bread to cool completely for at least 2-3 hours before slicing. This is crucial for the internal structure and texture of gluten-free bread.
Notes
Gluten-free sourdough can be a bit trickier than traditional wheat sourdough, but incredibly rewarding.
**Starter Activity:** Ensure your starter is exceptionally active. A weak starter will result in a dense loaf.
**Psyllium Husk:** This is vital for the structure of gluten-free bread, acting as a binder. Do not substitute or omit.
**Dough Hydration:** Gluten-free doughs are often stickier and wetter than wheat doughs. Don't be tempted to add too much extra flour during mixing or shaping, as this can lead to a dry loaf. Use rice flour for dusting.
**Cooling:** Resist the urge to slice warm bread! Gluten-free bread needs significant time to set its structure as it cools. Slicing too early will result in a gummy texture.
**Storage:** Store cooled bread in an airtight container at room temperature for 2-3 days, or slice and freeze for longer storage. Toasting slices from frozen works wonderfully.