Oh, the humble Maple Glaze! It’s one of those magical concoctions that truly bridges the gap between sweet and savory, making nearly everything it touches just a little bit more extraordinary. There’s a warmth and richness to pure maple that takes me right back to my grandmother’s kitchen, where the scent of something wonderful always wafted through the air, promising a treat. This glaze isn’t just about sweetness; it’s about a delicate balance that can elevate a simple dish into a memorable meal.
My earliest memories of maple involve sticky fingers and a huge grin, watching my grandma drizzle her homemade syrup over pancakes. As I grew older and started experimenting in my own kitchen, I discovered the incredible versatility of maple beyond breakfast. It became a personal mission to create a maple glaze that was effortlessly simple yet packed with that comforting, complex flavor I adored.
This particular recipe is a true gem for any home baker or cook, whether you’re looking for an easy way to add gourmet flair to a weeknight dinner or searching for that perfect finishing touch for your scones. It comes together in just 5 minutes of prep and 5 minutes of cook time, making it incredibly approachable, rewarding, and wonderfully versatile. My best tip? Always taste as you go; that’s the secret to baking with love!
What You Need to Make This Recipe
Crafting this delightful glaze calls for pure maple syrup, unsalted butter for richness, and a secret whisper of apple cider vinegar and Dijon mustard to truly balance the flavors. These simple ingredients, often already in your pantry, combine to create a truly magical maple glaze that’s both sweet and savory. You’ll find the complete list of exact measurements and ingredients in the recipe card just below.
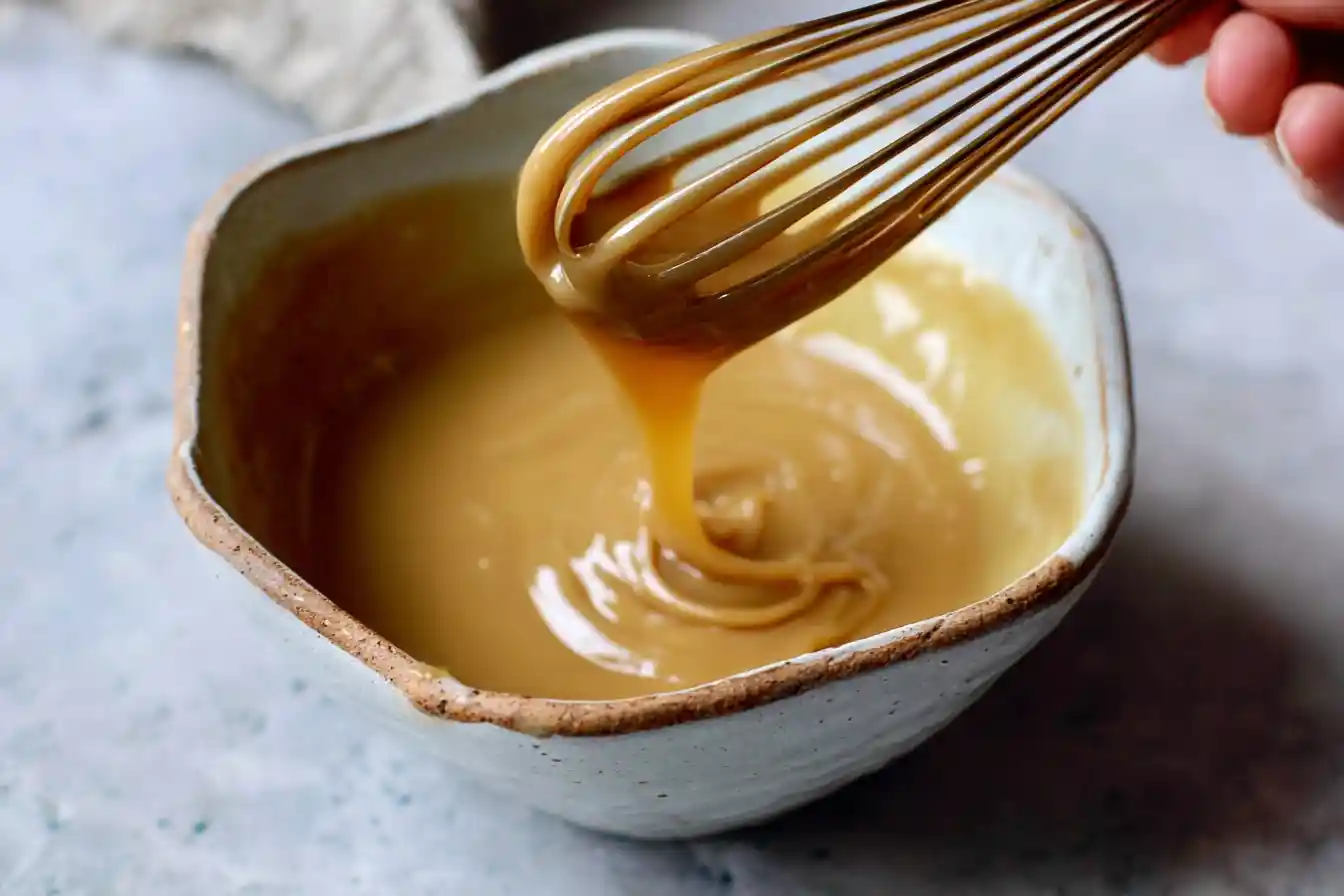
How to Make Maple Glaze
Making this versatile Maple Glaze is as delightful as it is simple, and it’s a testament to how quickly something so delicious can come together. You’ll start by gently melting the butter, then whisking in the pure maple syrup along with the apple cider vinegar, Dijon mustard, and a hint of spice. A quick simmer to let all those wonderful flavors meld, followed by thickening it ever so slightly with a cornstarch slurry, and voilà – you have a gleaming, flavorful maple glaze ready to transform your dishes.
Maple Glaze
Ingredients
Equipment
Method
- In a small saucepan, combine the maple syrup, unsalted butter, apple cider vinegar, Dijon mustard, sea salt, black pepper, and optional cayenne pepper.
- Place the saucepan over medium heat. Whisk continuously until the butter is completely melted and all ingredients are well combined. Bring the mixture to a gentle simmer.
- If a slightly thicker glaze is desired, in a separate small bowl, whisk together the cornstarch and cold water until smooth to create a slurry. Slowly pour the cornstarch slurry into the simmering maple mixture while whisking constantly. Continue to simmer and whisk for 1-2 minutes until the glaze slightly thickens to a drizzling consistency.
- Remove the saucepan from the heat. The glaze will thicken slightly more as it cools.
- Drizzle the warm Maple Glaze generously over your favorite savory soups, such as butternut squash, sweet potato, parsnip, or even a creamy chicken noodle soup, just before serving.
Notes
Pro Tips for Making This Maple Glaze
After countless batches and a few happy accidents, I’ve gathered a few cherished secrets to ensure your Maple Glaze turns out perfect every single time. It’s all about a little patience and paying attention to those subtle cues in the kitchen.
- Gentle Simmering is Key: When you’re simmering the glaze, keep the heat on medium-low. You want a gentle bubble, not a rolling boil, to prevent the maple syrup from scorching or reducing too quickly. This allows the flavors to truly meld without becoming overly concentrated.
- Balancing the Spices: Don’t be shy with the cayenne pepper! Just a tiny pinch makes all the difference, adding a barely-there warmth that enhances the maple without making it overtly spicy. It’s my secret to adding depth and intrigue.
- My Secret Trick: To ensure a lump-free, perfectly smooth glaze, always mix your cornstarch with cold water before adding it to the simmering mixture. This prevents clumping and allows the cornstarch to dissolve evenly, leading to a beautifully consistent maple glaze every time.
- Cooling for Consistency: This glaze will thicken beautifully as it cools. If you find it a little too thin straight off the stove, don’t fret! Let it sit for 5-10 minutes, and it will achieve that lovely, pourable consistency you’re looking for, ideal for coating everything from salmon to pastries.
Fun Variations for Maple Glaze
One of the things I adore most about this Maple Glaze is how easily you can make it your own! It’s like a blank canvas just waiting for a touch of your own creativity. Here are a few ways I love to twist it up, often inspired by what friends and family request:
A Touch of Spice
If you love a little extra kick, consider adding a dash more cayenne pepper or even a whisper of smoked paprika to your maple glaze. My friend, Sarah, always asks for a smoky version for her roasted chicken, and it’s truly divine! The warmth complements the sweetness of the maple beautifully.
Zesty Brightness
For a brighter, more vibrant glaze, whisk in a teaspoon of fresh orange or lemon zest right at the end of the cooking process. The citrus oils infuse a lovely fragrant note that cuts through the richness and adds a delightful zing. It’s wonderful on lighter desserts or even brushed over roasted carrots.
Herby Infusion
This might surprise you, but for savory dishes, infusing the maple glaze with a sprig of fresh rosemary or thyme during the simmering stage is absolutely magical. Just remove the herbs before serving. My brother swears by this herby maple glaze on his pork tenderloin – it’s a revelation!
What to Serve With Maple Glaze
This beautiful Maple Glaze truly lives up to its name, proving that it’s wonderful on everything. Its versatility is one of its most endearing qualities, allowing it to shine in both sweet and savory roles. It always brings a little smile to my face when I see how many ways my family enjoys it!
For a savory delight, I love serving this glaze over oven-baked salmon. The sweet and tangy notes perfectly complement the richness of the fish, creating a dish that feels effortlessly gourmet. It’s also utterly fantastic brushed onto roasted chicken or pork tenderloin during the last few minutes of cooking for a glossy, flavorful crust. My mom always pairs it with roasted sweet potatoes for a cozy autumn side dish that tastes like pure comfort.
On the sweeter side, imagine this delectable maple glaze drizzled generously over warm, fluffy scones fresh from the oven, or enriching a stack of golden pancakes or waffles. It’s also a fabulous addition to roasted root vegetables like carrots or parsnips, transforming them into a delightful treat. For a quick serving idea, keep a jar in the fridge and spoon it over plain Greek yogurt with a sprinkle of granola for a simple, yet elegant breakfast.
How to Store Maple Glaze
Knowing how to properly store your homemade Maple Glaze means you can enjoy its magic long after you’ve whipped up a batch! It’s all about keeping those wonderful flavors fresh and ready for whenever inspiration strikes.
Once your glaze has cooled completely, transfer it to an airtight container. I usually opt for a glass jar with a tight-fitting lid. It will keep beautifully in the refrigerator for up to a week. For longer storage, you can freeze it in a freezer-safe container for up to a month. Just be sure to leave a little headspace, as liquids can expand when frozen.
Reheating and Serving Tips
When you’re ready to enjoy your stored maple glaze, simply reheat it gently. If refrigerated, a few minutes in a small saucepan over low heat on the stovetop, stirring occasionally, will bring it back to a pourable consistency. You can also microwave it in 15-second intervals, stirring in between. If frozen, thaw it in the refrigerator overnight before gently reheating. My personal tip? If it seems a little thick after reheating, a tiny splash of hot water or even a bit of warm apple juice can help thin it back to that perfect consistency without losing any of its delightful flavor.
Nutritional Benefits
While this Maple Glaze is undeniably a treat, it brings some lovely natural goodness to the table thanks to pure maple syrup, which contains antioxidants and essential minerals like manganese and zinc. Combining these elements with simple, wholesome ingredients aligns perfectly with my philosophy that a dessert can be both satisfying and offer a touch of nourishing joy, making indulgence feel a little more balanced.
FAQs
Can I use artificial maple syrup for this recipe?
I always recommend using pure maple syrup for the best flavor and authentic richness in your Maple Glaze. Artificial syrups contain different ingredients and won’t give you the same depth of taste or natural goodness that pure maple provides.
How do I know when the glaze is the right thickness?
The Maple Glaze should be thick enough to coat the back of a spoon but still pourable. Remember, it will continue to thicken slightly as it cools, so a little thinner on the stove is perfectly fine.
Can I make this maple glaze ahead of time?
Absolutely! This Maple Glaze is perfect for making ahead. Prepare it up to a week in advance and store it in an airtight container in the refrigerator. Gently reheat it when you’re ready to use it.
What if my glaze separates or looks oily after reheating?
Sometimes butter can separate if reheated too quickly. Simply whisk the Maple Glaze vigorously for a minute or two over low heat, and it should come back together smoothly, looking as lovely as ever.
Conclusion
Creating this Simple Maple Glaze is truly an act of love, bringing together the warmth of pure maple with just a few other harmonious ingredients to create something truly special. It’s a testament to how the simplest things, made with a little care, can transform ordinary moments into extraordinary memories. Whether you’re glazing salmon for a delightful dinner or drizzling it over your morning scones, this versatile recipe is sure to inspire joy in your kitchen. So go on, gather your ingredients, and let’s create something sweet that brings people together and fills your home with that wonderful aroma of homemade happiness. Happy baking, my friends!