Oh, friends, there’s nothing quite like gathering around the table for a truly comforting meal, is there? And when that meal is an Authentic Italian Manicotti Recipe, it feels like a warm hug from Nonna herself. This isn’t just pasta; it’s a symphony of rich tomato sauce, creamy ricotta, and perfectly cooked shells that promises to bring smiles and satisfied sighs to everyone lucky enough to share a plate. It’s the kind of dish that makes you slow down, savor each bite, and remember the simple joys of good food and good company.
I remember countless afternoons in my grandmother’s kitchen, the air thick with the aroma of simmering tomatoes and fresh basil. She taught me that the secret to truly magical food isn’t just about the ingredients, but the love you pour into every stir and sprinkle. Manicotti was one of her specialties, a dish that always brought our big, boisterous family together, creating memories that still warm my heart today.
This recipe for Authentic Italian Manicotti Recipe is wonderfully rewarding to make and absolutely perfect for family dinners or even a special gathering. With a little patience and my step-by-step guidance, you’ll discover that creating a show-stopping Italian classic right in your own kitchen is not only achievable but deeply joyful. My top tip before you even begin? Put on some lovely Italian music – it truly sets the mood!
What You Need to Make This Recipe
Crafting this delightful dish truly starts with a handful of simple, wholesome ingredients. We’re talking about luscious whole milk ricotta, savory Parmesan, and sweet crushed tomatoes that come together to create that quintessential Authentic Italian Manicotti Recipe flavor. I always say, the best recipes let the quality of each ingredient shine through. You’ll find the full list of everything you need, with exact measurements, in the recipe card just below!
How to Make Authentic Italian Manicotti Recipe
Making this Authentic Italian Manicotti Recipe is a beautiful journey that unfolds in a few delightful steps. We’ll start by simmering a rich, aromatic marinara sauce, just like Nonna used to make. Next, we prepare the creamy ricotta filling, blending cheeses and herbs for that perfect texture. Then, we cook the manicotti shells to al dente perfection, ready for stuffing. Finally, we assemble everything, layering pasta, filling, and sauce, before baking it all until bubbly and golden. It’s a labor of love, but oh, so worth it!
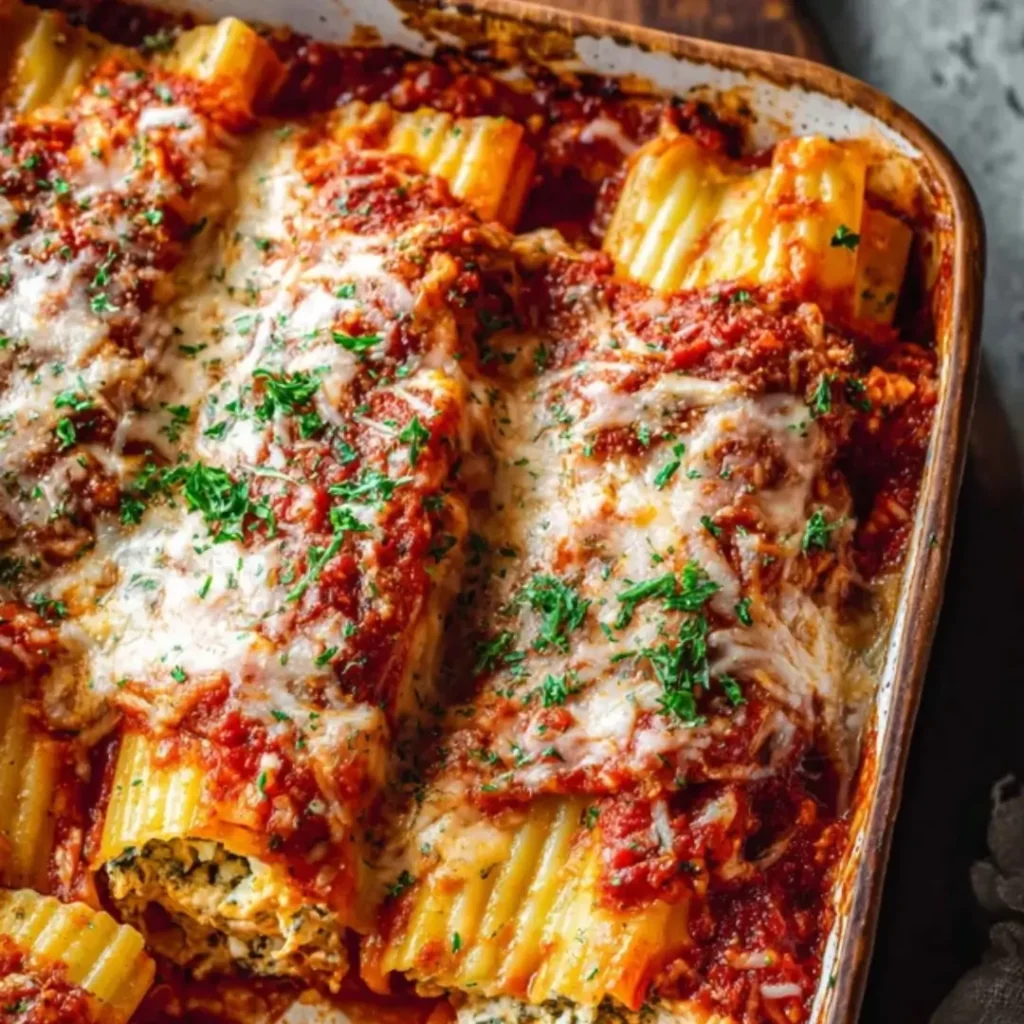
![A baking dish filled with delicious {{ $('Fetch Recipe Data').first().json["Main Keyword"] }} topped with marinara sauce and fresh herbs.](https://recipesdessert.net/wp-content/uploads/2026/04/authentic-italian-manicotti-recipe-.webp)
Authentic Italian Manicotti
Ingredients
Equipment
Method
- Heat olive oil in a large skillet or Dutch oven over medium heat. Add minced garlic and cook for 1-2 minutes until fragrant, being careful not to burn it.
- Stir in the tomato paste and cook for another 2-3 minutes, stirring frequently, to deepen its flavor.
- Pour in the crushed tomatoes. Add fresh basil, dried oregano, red pepper flakes (if using), granulated sugar, salt, and black pepper. Stir well to combine.
- Bring the sauce to a gentle simmer, then reduce heat to low, cover, and let it cook for at least 30-40 minutes, stirring occasionally. The longer it simmers, the richer the flavor.
- While the sauce simmers, in a large mixing bowl, combine the well-drained ricotta cheese, 1 cup shredded mozzarella, grated Parmesan cheese, egg, chopped fresh parsley, salt, black pepper, and a pinch of nutmeg.
- Mix thoroughly until all ingredients are evenly distributed. Taste and adjust seasoning if needed.
- Bring a large pot of salted water to a rolling boil. Add the manicotti shells and cook according to package directions, typically 7-9 minutes, until al dente. Do not overcook, as they will continue to cook in the oven.
- Drain the pasta immediately and rinse with cold water to stop the cooking process and prevent the shells from sticking together. Lay the cooked shells out on a clean kitchen towel to dry slightly while you prepare for filling.
- Preheat your oven to 375°F (190°C).
- Spread about 1.5 – 2 cups of the marinara sauce evenly over the bottom of a 9×13 inch baking dish.
- Carefully fill each manicotti shell with the ricotta mixture. This can be done with a small spoon, but using a piping bag (with a wide opening) or a Ziploc bag with the corner snipped off makes the process much easier and cleaner.
- Arrange the filled manicotti shells in a single layer in the prepared baking dish over the sauce.
- Pour the remaining marinara sauce evenly over the filled manicotti shells, ensuring they are well covered. Sprinkle the remaining 2 cups of shredded mozzarella cheese generously over the top.
- Cover the baking dish tightly with aluminum foil.
- Bake for 25 minutes, then remove the foil and bake for an additional 10-15 minutes, or until the sauce is bubbly and the cheese is melted and lightly golden brown.
- Remove from the oven and let rest for 5-10 minutes before serving. This allows the pasta to set and makes it easier to serve. Garnish with fresh basil, if desired.
Notes
Pro Tips for Making This Authentic Italian Manicotti Recipe
Over the years, I’ve picked up a few little tricks that make all the difference when creating an Authentic Italian Manicotti Recipe. These are the kind of helpful hints I wish I’d known when I first started, and I’m so happy to share them with you!
Don’t Overcook the Shells: For manicotti, you want your shells to be just past al dente – still firm enough to handle and stuff easily without tearing. Cooking them for about 8 minutes, rather than the full package instructions, usually does the trick. They’ll finish cooking beautifully in the oven.
Make Filling Ahead: The ricotta filling can be prepared a day in advance and kept refrigerated. This simple step saves so much time on the actual day you plan to bake, making the assembly of your Authentic Italian Manicotti Recipe a breeze!
My Secret Trick: When filling the shells, I always find it easiest to use a piping bag (or even a sturdy Ziploc bag with a corner snipped off!). It makes the process quick, clean, and ensures an even distribution of that glorious, cheesy filling into every shell.
The Power of Resting: After baking, let your manicotti rest for at least 10-15 minutes before serving. This allows the sauce to settle and the filling to firm up slightly, making for cleaner slices and preventing everything from sliding apart when you serve.
Fun Variations for Authentic Italian Manicotti Recipe
One of the greatest joys of home cooking is the freedom to get a little creative and make a classic recipe truly your own! While this Authentic Italian Manicotti Recipe is perfect as is, here are a few ideas to playfully adapt it to suit your family’s tastes.
Add Some Greens
My sister, bless her adventurous heart, loves to sneak in some finely chopped cooked spinach or even kale into the ricotta filling. It adds a lovely hint of green and a little extra nutritional boost without overpowering the classic flavors. Just make sure to squeeze out all excess moisture from the greens before mixing them in!
Meat Lover’s Twist
If you’re craving something heartier, consider adding some cooked, crumbled Italian sausage or ground beef to your marinara sauce. Brown the meat before adding the tomatoes and let it simmer together, infusing the sauce with rich, savory depth. It transforms this into an even more robust meal, perfect for colder evenings.
Spice it Up!
For those who enjoy a little kick, don’t shy away from adding a pinch more red pepper flakes to the marinara sauce, or even a tiny dash to your ricotta mixture. My friend Mark, who loves all things spicy, always asks me to do this; it adds a delightful warmth that complements the other flavors beautifully.
What to Serve With Authentic Italian Manicotti Recipe
When I think of serving this Authentic Italian Manicotti Recipe, my mind immediately drifts to creating a complete, comforting meal that feels both special and easy. It’s all about balance, and letting the star of the show shine!
I always love to pair this rich and satisfying dish with something fresh and vibrant. A simple, crisp green salad with a light vinaigrette is perfect – its tanginess cuts through the richness of the cheese and sauce beautifully. My mom always has a big bowl of greens on the table whenever manicotti is served!
Another wonderful accompaniment is a basket of warm, crusty garlic bread. Perfect for soaking up every last drop of that delicious marinara sauce! A quick serving idea: use pre-made garlic bread from the bakery; just pop it in the oven while the manicotti rests.
And for a truly authentic touch, a glass of a medium-bodied red wine, like a Chianti, or a sparkling water with a slice of lemon, would be absolutely delightful. It rounds out the meal, making it feel truly complete.
How to Store Authentic Italian Manicotti Recipe
One of the many wonderful things about this Authentic Italian Manicotti Recipe is how well it keeps, making it perfect for meal prepping or enjoying leftovers! I always like knowing my hard work in the kitchen can bring joy for more than just one meal.
Fridge Storage
Leftover manicotti can be stored in an airtight container in the refrigerator for up to 3-4 days. I like to press a piece of plastic wrap directly onto the surface of the manicotti before sealing the container; it helps keep everything moist and fresh.
Freezer Tips
If you’d like to keep your Authentic Italian Manicotti Recipe for longer, it freezes beautifully! Once completely cooled, transfer individual portions or the entire dish (if using a freezer-safe pan) to an airtight, freezer-safe container. It will keep well for up to 2-3 months. Thaw overnight in the refrigerator before reheating.
Reheating Instructions
To reheat, I recommend covering the dish loosely with foil and baking in a preheated oven at 350°F (175°C) until heated through, about 20-30 minutes for individual portions, or 35-45 minutes for a larger dish. If it seems a little dry, a splash of extra marinara sauce can bring it right back to life!
Nutritional Benefits
While we often focus on flavor when baking, this Authentic Italian Manicotti Recipe also offers some lovely nutritional benefits. With wholesome ricotta cheese providing a good source of protein and calcium, and the vibrant tomato sauce packed with lycopene, it’s a treat that’s both satisfying and nourishing. It beautifully blends the indulgence of a comforting dish with simple, quality ingredients.
FAQs
Faq 1
Can I make this manicotti recipe ahead of time?
Absolutely! You can assemble the entire Authentic Italian Manicotti Recipe a day in advance, cover it tightly, and refrigerate. Just add about 10-15 minutes to the baking time if cooking straight from the fridge.
Faq 2
What if I can’t find manicotti shells?
If manicotti shells are unavailable, you can use oven-ready lasagna noodles. Simply boil them for half the recommended time, then cut them into roughly 3×4-inch rectangles, spread with filling, and roll them up!
Faq 3
Can I use pre-made sauce for this recipe?
Yes, you certainly can! While homemade marinara is wonderful, a good quality jarred sauce will work perfectly. It’s a great shortcut when you’re short on time, allowing you to still enjoy this delicious Authentic Italian Manicotti Recipe.
Faq 4
How do I prevent the manicotti from drying out?
To keep your manicotti moist, ensure there’s a good layer of sauce both on the bottom of your baking dish and generously over the top of the assembled shells. You can also cover it with foil for the first part of baking.
Conclusion
Baking, for me, has always been about more than just the ingredients; it’s about the memories we create and the love we share through food. This Authentic Italian Manicotti Recipe is a testament to that philosophy, a dish that brings a piece of Nonna’s kitchen right into your home. It’s a comforting, rewarding, and truly delicious experience that I hope will inspire you to gather your loved ones around the table and create your own sweet, savory memories. Happy baking, my friends!