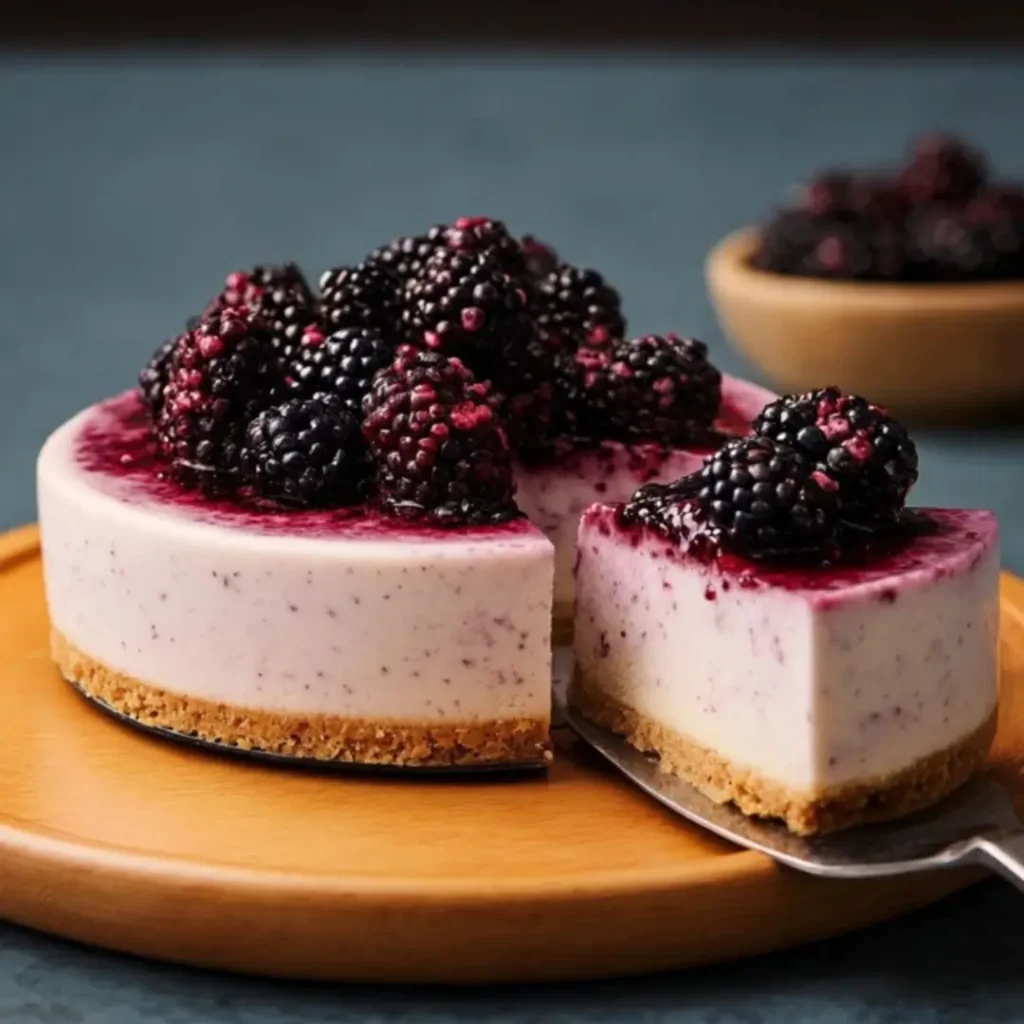
Oh, sweet friends, there’s nothing quite like a homemade cheesecake to bring a hush of pure delight to any gathering, is there? And when it comes to capturing the essence of summer in a dessert, my Mulberry Cheesecake The Creamiest truly takes the cake! Its velvety smooth texture, combined with the sweet-tart burst of fresh mulberries, creates a symphony of flavors that will transport you straight to sun-drenched days and joyful memories.
I still remember the first time I truly fell in love with cheesecake – it was a sun-dappled afternoon in Grandma Rose’s kitchen. She had just pulled a perfectly golden cheesecake from the oven, its aroma filling the air, and declared, “Sara, this is magic on a plate!” That day, I learned the simple secret: patience and good ingredients. And from then on, I’ve been on a mission to bring that magic to all of you.
This particular recipe for Mulberry Cheesecake The Creamiest is not only delightfully simple to prepare, making it perfect for both seasoned bakers and beginners, but it’s also wonderfully family-friendly, ensuring everyone will find a slice of happiness. My best tip for any cheesecake? Always make sure your cream cheese is softened to room temperature – it’s the key to that irresistibly smooth, lump-free filling!
What You Need to Make This Recipe
Crafting this delightful dessert means gathering a few simple, yet essential, ingredients. We’ll be leaning on the classic combination of graham cracker crumbs and melted butter for our perfectly crisp crust, while fresh mulberries lend their vibrant color and sweet-tartness to a beautiful compote. And of course, the heart of our Mulberry Cheesecake The Creamiest lies in the rich, full-fat cream cheese, sour cream, and heavy cream that give it that incredible, well, creaminess! You’ll find the full list of ingredients and precise measurements in the recipe card just below.
How to Make Mulberry Cheesecake The Creamiest
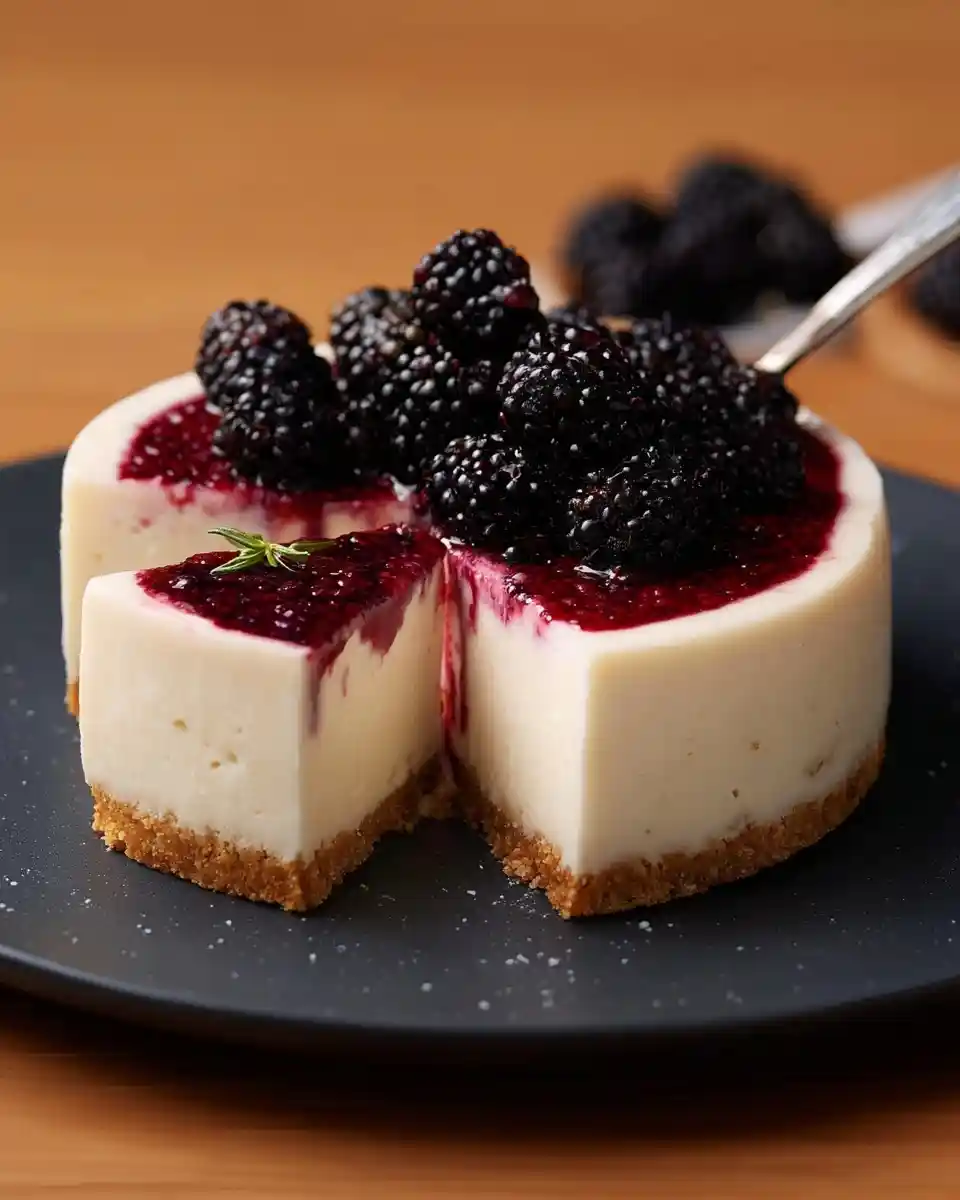
Creating this beautiful dessert is a journey of simple, joyful steps. We begin by pressing our buttery graham cracker crust into place, setting the stage for what’s to come. Then, we gently simmer those gorgeous fresh mulberries into a vibrant, luscious compote. Next, we prepare our rich, smooth cheesecake filling, pour it over the crust, and bake it to golden perfection. A slow chill in the refrigerator allows the Mulberry Cheesecake The Creamiest to set into its dreamy, creamy state, ready to be adorned with that wonderful compote before serving.
Mulberry Cheesecake The Creamiest
Ingredients
Equipment
Method
- Preheat oven to 350°F (175°C). Wrap the outside bottom and sides of a 9-inch springform pan with a double layer of heavy-duty aluminum foil to prevent water from seeping in during the water bath.
- In a medium bowl, combine graham cracker crumbs, 1/4 cup granulated sugar, and melted butter. Mix until well combined and the crumbs are moistened.
- Press the mixture evenly into the bottom of the prepared springform pan. Use the bottom of a glass or your fingers to compact it firmly.
- Bake for 8-10 minutes, or until lightly golden. Remove from oven and let cool slightly while preparing the compote and filling. Reduce oven temperature to 325°F (160°C).
- In a small saucepan, combine mulberries, 1/4 cup granulated sugar, and lemon juice. Cook over medium-low heat for 8-10 minutes, stirring occasionally, until mulberries have softened and released their juices.
- In a tiny bowl, whisk together cornstarch and cold water until smooth. Pour the cornstarch slurry into the mulberry mixture, stirring constantly. Cook for another 1-2 minutes, until the compote thickens. Remove from heat and let cool completely.
- In a very large mixing bowl, beat the softened cream cheese with an electric mixer on medium-low speed for 2-3 minutes until very smooth and creamy, scraping down the sides of the bowl as needed. Ensure there are no lumps.
- Gradually add 1 1/4 cups granulated sugar to the cream cheese, beating on low speed until just combined and smooth. Do not overmix.
- Add the sour cream, heavy cream, vanilla extract, and lemon zest. Beat on low speed until fully incorporated, scraping the bowl once or twice.
- Add the eggs one at a time, beating on very low speed just until each egg is combined. Stop mixing as soon as the last egg is incorporated. Overmixing after adding eggs can introduce too much air, leading to cracks.
- Pour about half of the cheesecake filling over the cooled crust in the springform pan. Dollop half of the cooled mulberry compote over the filling. Using a knife or skewer, gently swirl the compote into the filling.
- Carefully pour the remaining cheesecake filling over the swirled layer. Dollop the rest of the mulberry compote on top and gently swirl again for a beautiful marble effect.
- Place the foil-wrapped springform pan into a large roasting pan. Carefully pour hot water into the roasting pan until it reaches about halfway up the sides of the springform pan.
- Carefully transfer the roasting pan to the preheated oven (325°F/160°C). Bake for 60-75 minutes, or until the edges are set but the center 2-3 inches still jiggles slightly when gently shaken. Do not overbake.
- Turn off the oven, prop the oven door open slightly, and let the cheesecake cool in the water bath inside the oven for 1 hour. This slow cooling prevents cracking.
- Carefully remove the springform pan from the water bath and the foil. Let it cool completely on a wire rack at room temperature for another 1-2 hours. Once fully cooled, cover the cheesecake with plastic wrap and refrigerate for at least 6-8 hours, or preferably overnight, for best texture and flavor.
- Before serving, run a thin knife around the edge of the pan before releasing the springform ring. Slice with a hot, clean knife for neat portions. Garnish with fresh mulberries if desired. Enjoy your Mulberry Cheesecake The Creamiest!
Notes
Pro Tips for Making This Mulberry Cheesecake The Creamiest
Achieving that truly divine texture and flavor for your Mulberry Cheesecake The Creamiest is all about a few loving touches and tried-and-true techniques I’ve picked up over the years.
When mixing your cheesecake filling, remember that gentle is best. Overmixing can incorporate too much air, which can lead to cracks during baking. I always recommend mixing until just combined, keeping that delicate texture in mind.
My Secret Trick: To prevent cracks in your cheesecake, I always bake it in a water bath. Place your springform pan (wrapped tightly in foil to prevent leaks) into a larger roasting pan, and then fill the roasting pan with hot water halfway up the sides of the springform. This creates a moist, even baking environment.
After baking, don’t rush the cooling process! I like to turn off the oven and let the cheesecake cool slowly in the oven with the door ajar for about an hour before moving it to a wire rack to cool completely, then into the refrigerator for at least 6 hours, or ideally overnight. This gradual cooling prevents sudden temperature changes that can cause cracking.
Finally, for that perfectly smooth compote, don’t be afraid to gently mash some of the mulberries as they simmer. This helps release their juices and deepen the flavor, creating a wonderfully rustic yet refined topping for your Mulberry Cheesecake The Creamiest.
Fun Variations for Mulberry Cheesecake The Creamiest
One of the joys of baking is letting your creativity shine, and this Mulberry Cheesecake The Creamiest is a wonderful canvas for playful variations!
Berry Bliss Twists
If mulberries aren’t in season or you fancy a different berry, feel free to swap them out! My sister always asks me to swirl in a raspberry compote or even a mixed berry one with strawberries and blueberries. The tartness of raspberries pairs beautifully with the creamy base.
Citrus Zest & Spice
For an extra layer of brightness, consider adding a little more lemon zest directly into the cheesecake filling. You could even experiment with a pinch of cardamom or a whisper of ginger in the crust for a cozy, unexpected warmth that complements the fruit perfectly.
Chocolate Dream Swirl
For the chocolate lovers, try gently swirling a spoonful or two of melted dark chocolate into the plain cheesecake batter just before baking. It adds a lovely marbled effect and a decadent richness that makes your Mulberry Cheesecake The Creamiest feel even more special.
What to Serve With Mulberry Cheesecake The Creamiest
Ah, the delightful moment of serving! While your Mulberry Cheesecake The Creamiest is certainly a star on its own, a few simple accompaniments can elevate the experience even further.
I absolutely love serving a slice with a light dusting of powdered sugar and, if I’m feeling fancy, a few fresh mint leaves for a pop of color. A simple dollop of freshly whipped cream, ever so lightly sweetened, adds another layer of indulgence without overpowering the delicate mulberry flavor. My mom always says a good cup of English Breakfast tea is the perfect partner to any cheesecake, and I tend to agree! And for those warmer evenings, a small scoop of good quality vanilla bean ice cream is a truly heavenly pairing.
How to Store Mulberry Cheesecake The Creamiest
Keeping your delicious Mulberry Cheesecake The Creamiest fresh and flavorful is wonderfully simple, ensuring you can savor every last bite.
Refrigerator Storage
Once your cheesecake has fully chilled, it should always be stored in the refrigerator. I like to cover it loosely with plastic wrap or place it in an airtight container to prevent it from absorbing any other odors from the fridge and to keep it from drying out. It will stay wonderfully fresh for up to 3-4 days this way.
Freezing for Later Enjoyment
If you want to enjoy your Mulberry Cheesecake The Creamiest for longer, it freezes beautifully! I recommend freezing individual slices for easier serving. Place uncovered slices on a baking sheet in the freezer until firm, about 1-2 hours. Then, wrap each slice tightly in plastic wrap, followed by a layer of aluminum foil, and place them in a freezer-safe bag or container. They will keep well for up to 1 month. When you’re ready to enjoy, simply thaw a slice in the refrigerator overnight.
Nutritional Benefits
While we bake for joy and flavor, it’s lovely to know that our Mulberry Cheesecake The Creamiest also offers a few wholesome elements! The fresh mulberries are packed with antioxidants and vitamins, adding a touch of natural goodness to this indulgent treat. It’s a testament to my belief that a homemade dessert, crafted with simple, quality ingredients, can be both satisfying and a delightful part of a balanced life.
FAQs
Faq 1
Can I use frozen mulberries for the compote?
Absolutely! Frozen mulberries work perfectly. Just be sure to thaw them first and drain any excess liquid before using them in the compote for your Mulberry Cheesecake The Creamiest. The flavor will still be wonderfully vibrant.
Faq 2
Why did my cheesecake crack on top?
Cracks often happen from overmixing the batter, which incorporates too much air, or from sudden temperature changes during baking or cooling. Using a water bath and cooling your Mulberry Cheesecake The Creamiest slowly helps prevent this.
Faq 3
How do I know when the cheesecake is done baking?
The edges of the cheesecake should be set, but the very center (about 2-3 inches) should still have a slight jiggle when you gently shake the pan. It will continue to set as it cools, giving your Mulberry Cheesecake The Creamiest that perfect texture.
Faq 4
Can I make the mulberry compote ahead of time?
Yes, you certainly can! The mulberry compote can be made up to 3 days in advance and stored in an airtight container in the refrigerator. This makes assembling your Mulberry Cheesecake The Creamiest even quicker.
Conclusion
There you have it, sweet friends – a recipe for Mulberry Cheesecake The Creamiest that I truly hope brings as much joy to your kitchen as it does to mine. It’s more than just a dessert; it’s an invitation to slow down, savor the process, and create something truly special with your own hands. Remember, every whisk, every stir, and every sprinkle of love you put into your baking transforms simple ingredients into magical treats that create lasting memories. So go on, embrace the delightful challenge, and let your home be filled with the sweet aroma of happiness!