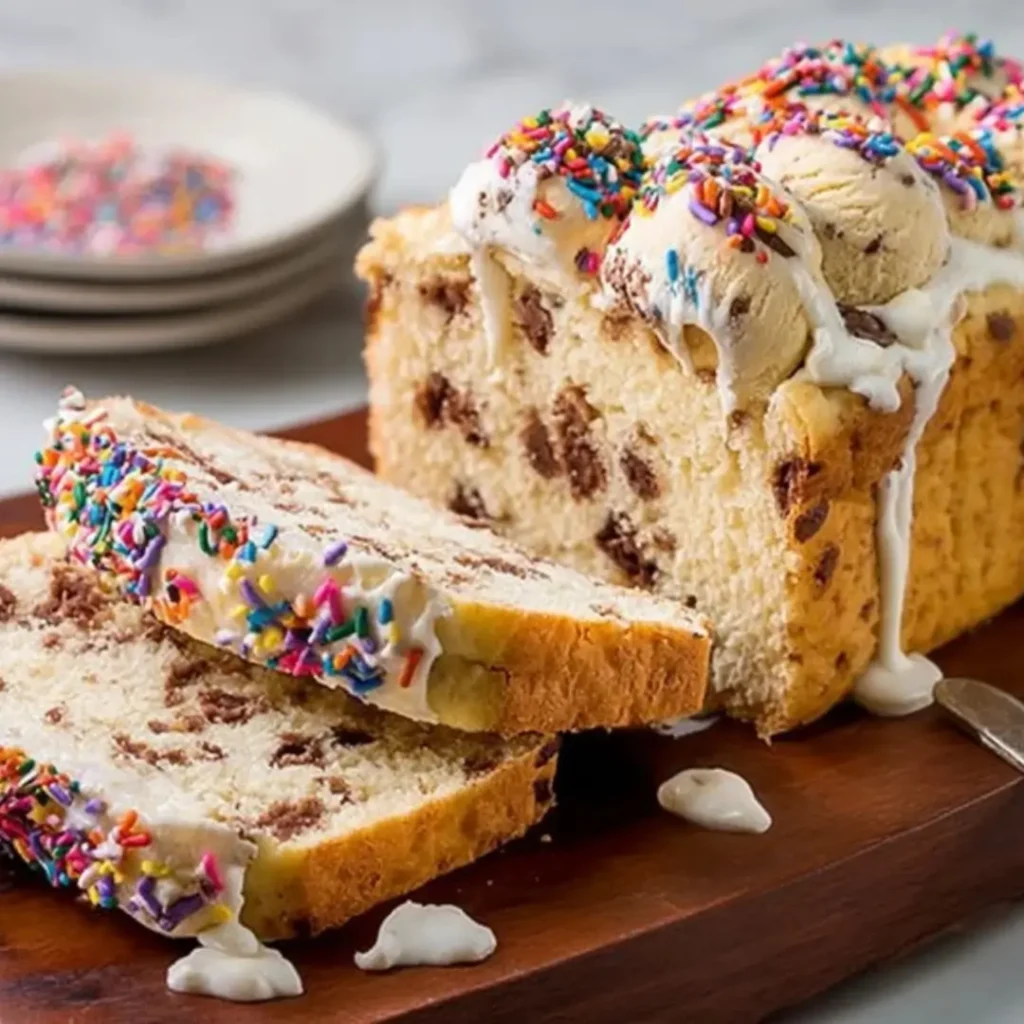
Oh, darlings, there’s nothing quite like the magic that happens when simple ingredients come together to create something truly extraordinary. And if you’re looking for that kind of enchanting transformation, let me introduce you to the delightful world of Ice Cream Bread. This unbelievably easy treat bakes up with a tender crumb, a subtly sweet flavor, and a delightful aroma that will transport you straight back to the comforting warmth of grandma’s kitchen.
I remember one summer afternoon, trying to whip up something special for my friends with what little we had in the pantry. Inspired by a forgotten tub of melting ice cream, I hesitantly mixed it with flour, and to my absolute astonishment, a beautiful, fragrant loaf emerged from the oven. It was a revelation, and that day sparked a joy in simple, inventive baking that has stayed with me ever since.
This incredible recipe offers so much more than just convenience; it’s a delightful way to involve the whole family in the kitchen, and it’s perfect for those spontaneous gatherings or when you simply crave a sweet, comforting hug in bread form. My best advice? Embrace the joy of the process, because the most cherished memories are often baked with the simplest of ingredients and the purest of hearts.
What You Need to Make This Recipe
To conjure up this wonderfully simple dessert, you truly only need two main ingredients: self-rising flour and your favorite ice cream. The magic lies in how these two humble components interact, creating a light and flavorful crumb that’s simply irresistible. I always say that the beauty of baking often rests on the shoulders of just a few star players, and this ice cream bread truly shines with them. You’ll find the full list of ingredients and precise measurements in the recipe card below.
How to Make Ice Cream Bread
Creating this delightful loaf is as easy as pie – or, dare I say, easier! You’ll start by gently mixing your chosen ice cream with self-rising flour until just combined, being careful not to overmix. Then, pour your batter into a prepared loaf pan and let your oven work its magic. Before you know it, your kitchen will be filled with a heavenly aroma, and a beautifully golden-brown loaf will be ready to enjoy.
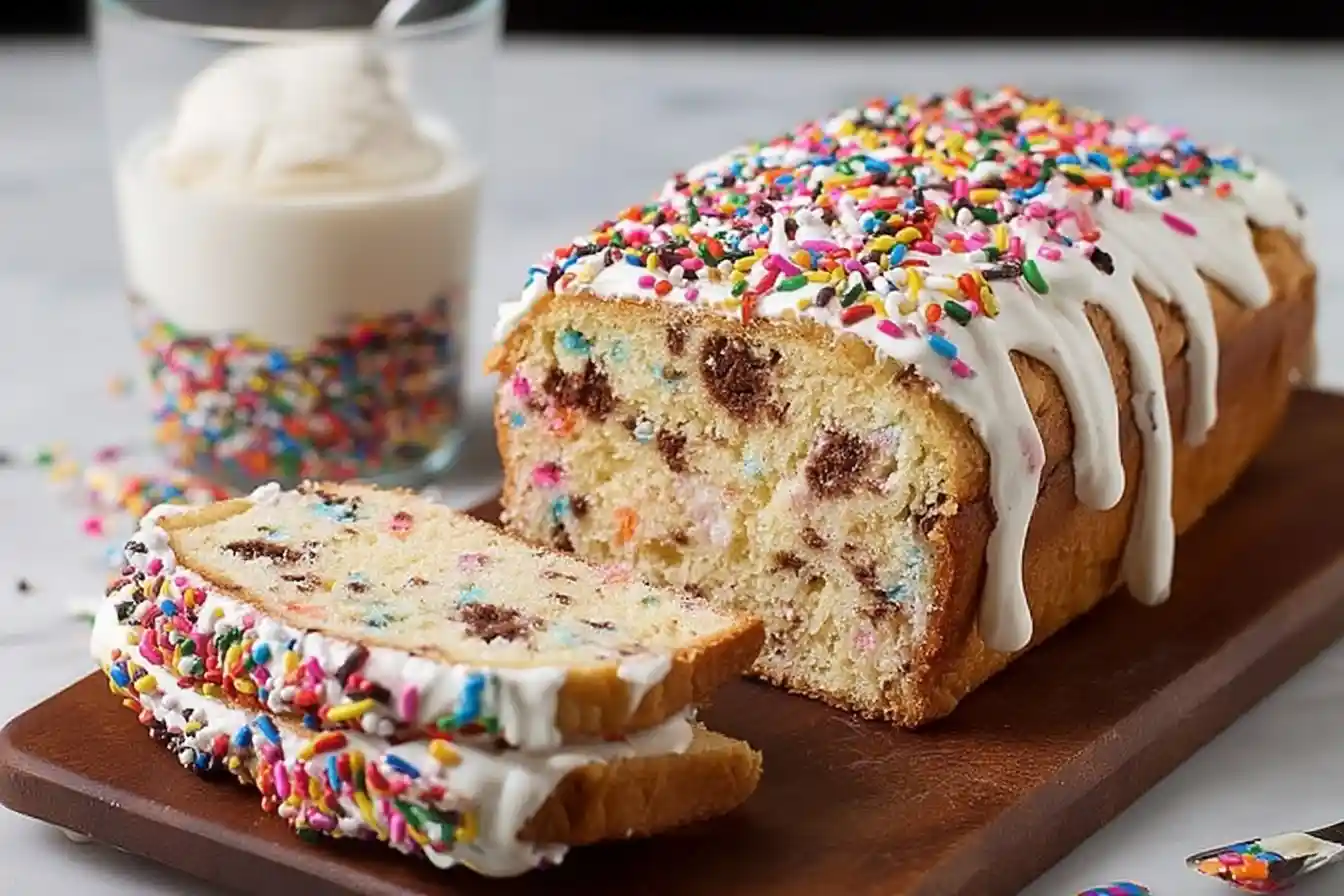
Easy 2-Ingredient Ice Cream Bread
Ingredients
Equipment
Method
- Preheat your oven to 350°F (175°C). Lightly grease and flour a 9×5 inch loaf pan, or line it with parchment paper for easy removal.
- Ensure your chosen ice cream is softened to a thick, batter-like consistency. You can achieve this by leaving it at room temperature for about 15-20 minutes, or by microwaving it in 10-second intervals until soft but not fully melted.
- In a large mixing bowl, add the softened ice cream.
- Gradually add the self-rising flour to the ice cream. Using a spatula, gently fold the flour into the ice cream until just combined. Be careful not to overmix, as this can result in a tough bread. A few small lumps are perfectly fine.
- If you are using optional mix-ins like sprinkles or chocolate chips, gently fold them into the batter at this stage.
- Pour the prepared batter evenly into your greased and floured loaf pan.
- Bake for 45-55 minutes, or until a wooden skewer or toothpick inserted into the center of the loaf comes out clean. The top of the bread should be beautifully golden brown.
- Remove the loaf pan from the oven and let the bread cool in the pan for 10-15 minutes before carefully transferring it to a wire rack to cool completely.
- Once cooled, slice the ice cream bread and serve. Enjoy!
Notes
Pro Tips for Making This Ice Cream Bread
Baking, for me, has always been about discovery and learning, and over the years, I’ve picked up a few little secrets that make all the difference. When it comes to whipping up a perfect Ice Cream Bread, these nuggets of wisdom will help ensure your loaf turns out beautifully every single time.
My Secret Trick: I always make sure my ice cream is softened but not completely melted before mixing. It helps achieve that perfect, even texture throughout the batter, preventing a dense loaf and ensuring a light, airy crumb. It’s a small step that makes a huge difference!
Another tip I always share is to avoid overmixing your batter. Once the flour is just incorporated, stop. Overmixing can develop the gluten too much, leading to a tough bread instead of the tender, melt-in-your-mouth texture we’re aiming for with this delightful ice cream bread.
Don’t forget to properly prepare your loaf pan! I always grease and lightly flour my pan, or line it with parchment paper, especially for recipes like this where a delicate crumb means you want it to release effortlessly. It saves so much heartache after all your hard work!
Lastly, be patient with the cooling process. As tempting as it is to slice into that warm, fragrant loaf right away, letting your Ice Cream Bread cool in the pan for a bit, then fully on a wire rack, allows it to set properly and ensures perfect slices.
Fun Variations for Ice Cream Bread
One of the greatest joys of baking is the freedom to play and personalize, turning a simple recipe into something truly unique to your taste buds. This Ice Cream Bread is a wonderful canvas for creativity, and I love encouraging bakers to experiment. Here are a few ways you can infuse your own sweet personality into this comforting treat:
Flavorful Twists
My sister always asks me to swirl in a touch of raspberry jam or a handful of fresh blueberries with vanilla ice cream for a vibrant, fruity twist. Or, for the chocolate lovers (like me!), swapping out half the ice cream for a rich chocolate fudge flavor and adding chocolate chips into the batter is pure decadence. A friend of mine swears by using coffee ice cream and a sprinkle of cinnamon for a morning-worthy loaf!
Textural Delights
Consider adding different mix-ins! Beyond sprinkles and chocolate chips, try chopped nuts like pecans or walnuts for a lovely crunch. Mini marshmallows, a swirl of caramel, or even a handful of dried cranberries can add delightful texture and bursts of flavor to your ice Cream Bread. Just be mindful not to overcrowd the batter.
Seasonal Sensations
In the autumn, I adore using pumpkin spice ice cream, perhaps with a dash of extra cinnamon. During the holidays, peppermint stick ice cream makes for a festive and surprisingly delicious loaf. The possibilities truly are endless, reflecting the changing seasons and our cravings.
What to Serve With Ice Cream Bread
There’s a special kind of warmth that comes from sharing a freshly baked treat, and while this delightful Ice Cream Bread is wonderful all on its own, a few simple accompaniments can truly elevate the experience. Think of these as little touches that make a simple dessert feel like a celebration.
I love serving it with a generous scoop of vanilla bean ice cream (yes, more ice cream!) or a dollop of freshly whipped cream. The cool, creamy texture perfectly complements the tender crumb of the bread.
For a touch of fruitiness, a handful of fresh berries – raspberries, blueberries, or sliced strawberries – brings a lovely brightness. My mom always pairs it with a steaming mug of hot cocoa in the cooler months, which feels like a big, comforting hug. And for those afternoon tea moments, a simple drizzle of warm caramel sauce or a light dusting of powdered sugar makes it feel extra special.
How to Store Ice Cream Bread
After all the love and effort you’ve poured into baking your delicious loaf, keeping it fresh and flavorful is key. This is where my years of learning how to preserve those sweet moments come in handy, ensuring every slice of your Ice Cream Bread tastes just as wonderful as the first.
Keeping it Fresh
Once your bread has completely cooled, I recommend storing it at room temperature in an airtight container for up to 2-3 days. This helps maintain its delightful moisture and prevents it from drying out. If your kitchen tends to be on the warmer side, or if you’re keeping it longer, the refrigerator is a good option; it will last there for about a week.
Freezer Friendly Tips
For longer storage, your Ice Cream Bread freezes beautifully! Wrap individual slices or the whole loaf tightly in plastic wrap, then again in aluminum foil. It can be stored in the freezer for up to 3 months. When you’re ready to enjoy, simply thaw it at room temperature or warm a slice gently in the microwave or oven until soft and fragrant. My personal tip for reheating is a quick toast in a toaster oven; it brings back a lovely crispness to the edges!
Nutritional Benefits
While we often bake for pure joy and indulgence, it’s lovely to know that even our sweet treats can offer a little something extra. When you choose a classic vanilla or fruit-based ice cream, your Ice Cream Bread can provide a small amount of calcium from the dairy, contributing to a treat that’s both satisfying and nourishing in its simplicity. It’s all about finding that wonderful balance between wholesome ingredients and delightful enjoyment!
FAQs
Can I use any flavor of ice cream?
Absolutely! The beauty of this recipe is its versatility. Any flavor of ice cream will work, so pick your favorite or experiment with new combinations to create your perfect Ice Cream Bread.
Do I have to use self-rising flour?
Yes, self-rising flour is essential for this recipe as it contains leavening agents (baking powder and salt) that help the bread rise. If you don’t have it, you can make your own by adding 1.5 teaspoons of baking powder and 1/4 teaspoon of salt to 1 cup of all-purpose flour.
How do I know when the bread is done?
Your loaf is ready when a wooden skewer or toothpick inserted into the center comes out clean. The top will also be golden brown, and the edges will be pulling slightly away from the pan.
Can I add mix-ins to the batter?
Certainly! Sprinkles, chocolate chips, nuts, or dried fruit can be gently folded into the batter before baking. Just be sure not to overmix, as this can lead to a tough loaf.
Conclusion
Baking, for me, has always been about more than just ingredients and ovens; it’s about the joy of creating, the warmth of shared moments, and the sweet satisfaction of a simple treat. This Easy 2-Ingredient Ice Cream Bread embodies all of that, transforming everyday staples into a truly memorable dessert. I wholeheartedly encourage you to try this recipe, gather your loved ones, and savor the delightful flavors and the precious memories you’ll undoubtedly create. Happy baking, my dears!