Get ready to bring some spooky-cute fun to your kitchen with these Spider Cookies! Soft, chocolatey cookies topped with chocolate truffles, candy eyes, and piped chocolate legs turn into the most adorable (and delicious) spiders you’ve ever seen. Perfect for Halloween parties, kids’ baking projects, or just surprising your family with a playful sweet treat. Trust me, these are as fun to make as they are to eat!
Why You’ll Love This Recipe
- Super Fun and Festive: These cookies are an instant Halloween hit, bringing smiles (and maybe a few giggles) to anyone who sees them.
- Chocolate Lover’s Dream: Soft cocoa cookies + a rich truffle center = pure indulgence.
- Kid-Friendly Project: Little hands will love helping decorate the spiders — it’s a baking craft and snack all in one!
- Make-Ahead Friendly: You can bake the cookies ahead and decorate later, making party prep a breeze.
Ingredients
Here’s what you’ll need to create these creepy-cute Spider Cookies:
- Unsalted Butter: Adds richness and softness to the cookies.
- Granulated Sugar: Sweetens and helps with the cookie’s structure.
- Brown Sugar: Brings extra moisture and a hint of caramel flavor.
- Large Egg: Binds the dough together and adds tenderness.
- Vanilla Extract: Enhances the overall flavor profile.
- All-Purpose Flour: Forms the base of the cookie dough.
- Baking Soda: Gives a slight lift and softness.
- Salt: Balances and sharpens the sweet flavors.
- Cocoa Powder: Provides the rich chocolate flavor and dark color for a spooky base.
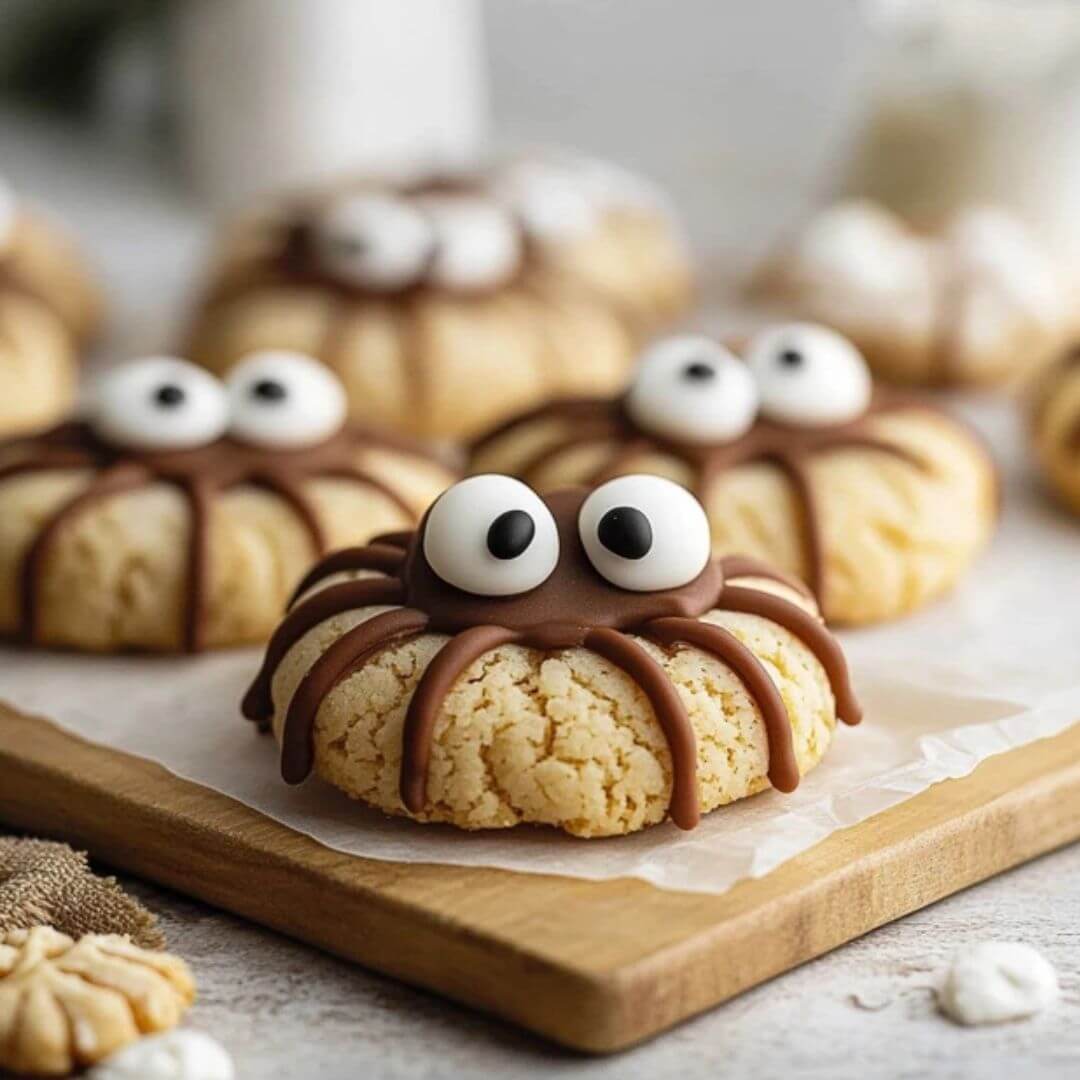
- Chocolate Truffle Candies (like Lindt or Ferrero Rondnoir): These become the spider bodies — indulgent and eye-catching.
- Mini Chocolate Chips or Candy Eyes: Used for the adorable spider eyes.
- Melted Dark Chocolate or Black Decorating Gel: For piping on the spider legs.
Note: Full ingredient measurements are in the recipe card below.
How to Make the Recipe
Step 1: Preheat the Oven
Set your oven to 350°F (175°C) and line a baking sheet with parchment paper.
Step 2: Cream the Butter and Sugars
In a large bowl, beat together the softened butter, granulated sugar, and brown sugar until light and fluffy (about 2–3 minutes).
Step 3: Add Egg and Vanilla
Mix in the egg and vanilla extract until everything is smooth and combined.
Step 4: Combine Dry Ingredients
In another bowl, whisk together the flour, cocoa powder, baking soda, and salt.
Step 5: Mix Wet and Dry
Gradually add the dry ingredients to the wet mixture, mixing on low speed just until combined. Avoid overmixing to keep the cookies tender.
Step 6: Scoop and Bake
Scoop tablespoon-sized balls of dough onto the prepared baking sheet, spacing them about 2 inches apart. Bake for 9–11 minutes until set at the edges but soft in the center.
Step 7: Add Spider Bodies
Right after taking the cookies out of the oven, gently press a chocolate truffle into the center of each warm cookie. Let them cool completely.
Step 8: Decorate the Spiders
Once cooled, use melted dark chocolate in a piping bag or black decorating gel to pipe 3–4 little legs on each side of the truffle. Stick on candy eyes or mini chocolate chips using a dab of melted chocolate.
Pro Tips for Making the Recipe
- Press the Truffle Gently: Too much pressure can crack the cookie — just a light press is enough.
- Use a Small Piping Tip: For the legs, a fine piping tip or even a small zip-top bag with the corner snipped works great.
- Cool Completely Before Decorating: Warm cookies can make the chocolate legs run or melt.
- Have Fun with Toppings: Play around with using different candies or edible glitter for extra spooky flair!
How to Serve
These Spider Cookies are perfect for:
- Halloween Parties: Arrange them on a festive platter alongside other spooky treats.
- Kids’ Lunchboxes: Surprise your little ones with a playful cookie.
- Gift Bags: Wrap them up individually for cute Halloween favors.
- Coffee Breaks: Honestly, they’re delightful with a cup of coffee or hot cocoa!
Make Ahead and Storage
Storing Leftovers
Place cookies in an airtight container at room temperature for up to 4 days.
Freezing
Freeze undecorated cookies in a freezer-safe bag for up to 2 months. Thaw and decorate when ready to serve.
Reheating
No reheating needed, but if you like, you can warm them slightly in the microwave for a gooey center.
FAQs
Can I use a different candy for the spider body?
Yes! You can try mini peanut butter cups, chocolate kisses, or any round candy that holds its shape.
Can I make the dough ahead of time?
Absolutely — prepare the dough and refrigerate it for up to 24 hours before baking.
How do I keep the legs from smudging?
Make sure the cookies are completely cool before piping, and let the chocolate set fully before moving them.
Can I make these cookies gluten-free?
Yes! Use a good 1:1 gluten-free flour blend, and check your other ingredients to ensure they’re gluten-free.
Spider Cookies
Ingredients
Equipment
Method
- Preheat oven to 350°F (175°C). Line a baking sheet with parchment paper.
- Cream together the butter, brown sugar, and granulated sugar until fluffy. Add eggs and vanilla, mix well.
- In a separate bowl, whisk together the flour, baking soda, and salt. Gradually add to the wet mixture.
- Roll dough into balls and place on the prepared baking sheet. Bake for 10 minutes or until golden.
- Immediately press a chocolate truffle into the center of each cookie. Let cool for 10 minutes.
- Use melted chocolate to pipe legs around the truffle and attach candy eyes. Let set before serving.