Oh, sweet friends, there’s nothing quite like the simple joy of a homemade dessert, especially when it’s one that whispers promises of summer and sunshine! Today, we’re diving into the delightful world of Fruity No-Churn Ice Cream, a truly magical treat that proves you don’t need fancy equipment to whip up something extraordinary. Imagine spoonfuls of creamy, dreamy ice cream bursting with the vibrant taste of fresh berries—it’s pure happiness, I tell you!
My love for desserts blossomed in my grandmother’s kitchen, where the aroma of baking always filled the air. She taught me that the best recipes come from the heart, and sometimes, the simplest methods yield the most delicious results. This no-churn wonder reminds me of those carefree afternoons, creating sweet memories with just a few humble ingredients.
This recipe is not only incredibly easy to make, but it’s also wonderfully versatile, making it perfect for family gatherings or a quiet treat for yourself. And here’s a little tip from my kitchen to yours: always choose the freshest, ripest berries you can find for that truly luscious flavor!
What You Need to Make This Recipe
Crafting this delightful ice cream begins with a handful of accessible ingredients that transform into pure magic. The star, of course, is our medley of mixed berries, bringing a burst of natural sweetness and color to this Fruity No-Churn Ice Cream. Coupled with rich heavy cream and sweetened condensed milk, these elements form a perfectly balanced and utterly delicious base. You’ll find the full list of ingredients and precise measurements waiting for you in the recipe card below.
How to Make Fruity No-Churn Ice Cream
Whipping up this incredible Fruity No-Churn Ice Cream is an absolute breeze, I promise! You’ll start by gently preparing a vibrant berry swirl, then create the luscious, airy no-churn base by whipping heavy cream until it’s perfectly fluffy. Finally, layer the berry mixture with the cream base, swirl them together, and let the freezer do its wonderful work. It’s truly that simple to achieve a dessert that tastes like a dream!
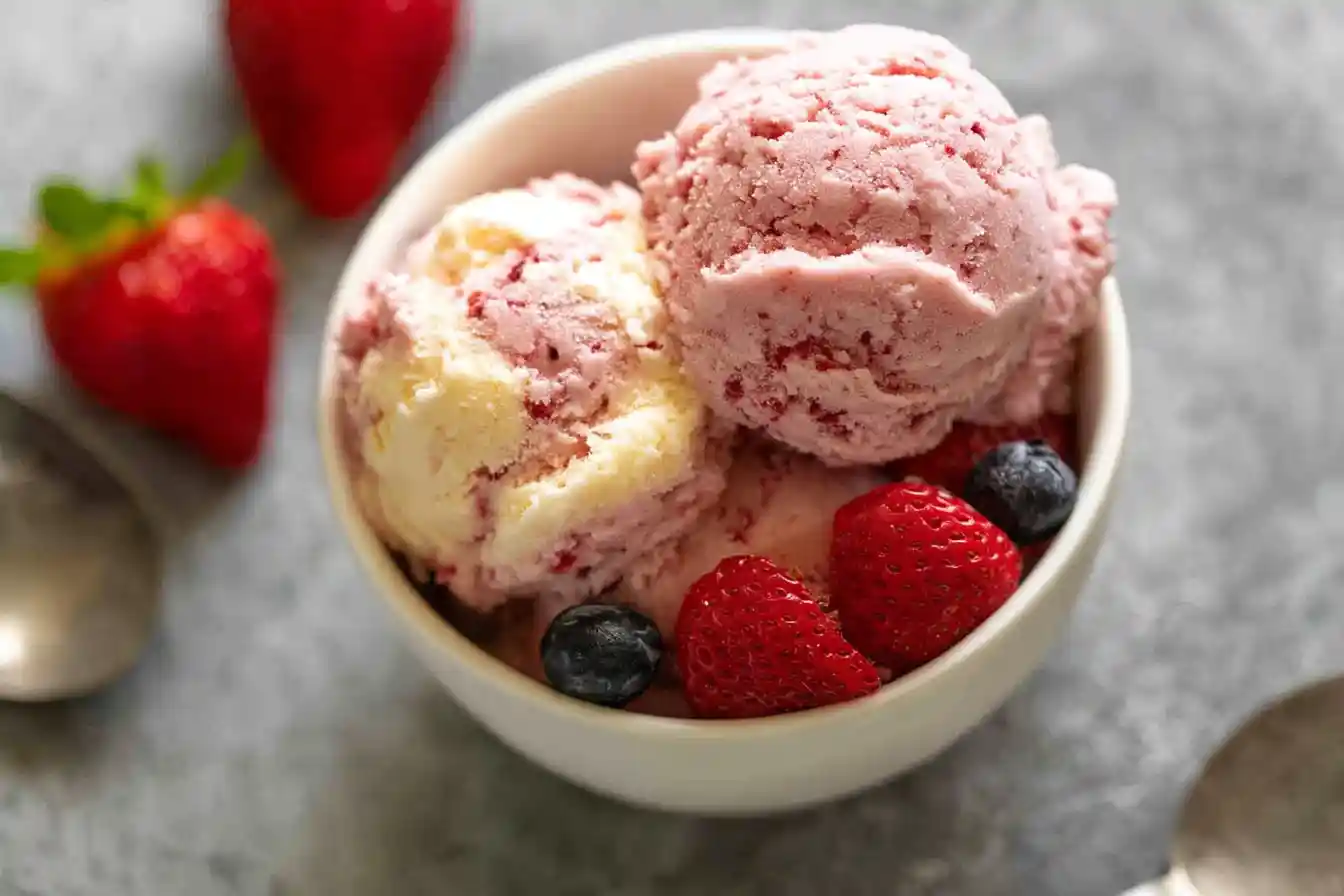
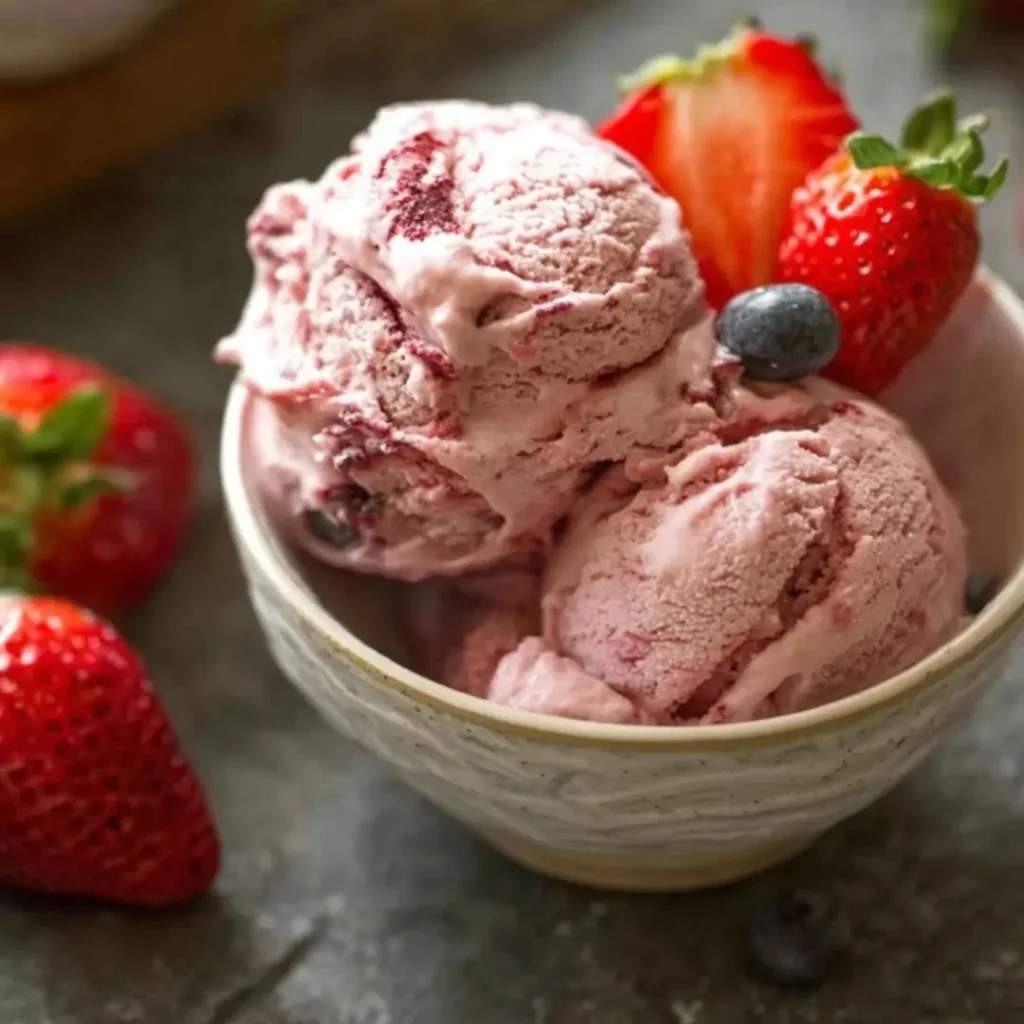
Luscious Berry Blast No-Churn Ice Cream
Ingredients
Equipment
Method
- Combine berries, sugar, and lemon juice in a small saucepan. Cook over medium heat, mashing gently with a fork or potato masher, until berries break down and the sauce thickens slightly (about 5-7 minutes).
- Remove from heat and let cool completely to room temperature. This is crucial; warm berries will melt the ice cream base.
- In a large mixing bowl, using an electric mixer, whip the cold heavy cream on medium-high speed until stiff peaks form (about 3-5 minutes). Be careful not to over-whip, which can result in a grainy texture.
- In a separate bowl, whisk together the cold sweetened condensed milk, vanilla extract, and pinch of salt until well combined.
- Gently fold about one-third of the whipped cream into the condensed milk mixture to lighten it. Then, gently fold in the remaining whipped cream until no streaks remain. Be careful not to deflate the cream.
- Pour half of the ice cream base into a 9×5 inch loaf pan or other freezer-safe container.
- Spoon half of the cooled berry swirl over the base. Using a knife or skewer, gently swirl the berry mixture into the ice cream base, being careful not to overmix.
- Pour the remaining ice cream base over the top.
- Spoon the rest of the berry swirl on top and repeat the swirling process.
- Cover the loaf pan tightly with plastic wrap or aluminum foil, pressing the wrap directly onto the surface of the ice cream to prevent ice crystals. Freeze for at least 6 hours, or preferably overnight, until firm.
Notes
To ensure your Fruity No-Churn Ice Cream turns out absolutely perfect every single time, I’ve gathered a few tried-and-true tips from my own kitchen adventures.
Chilling is Key: Always make sure your heavy cream and mixing bowl are very cold before you start whipping. I often pop my bowl and beaters in the freezer for 10-15 minutes beforehand; it truly helps the cream achieve that perfect, stiff peak consistency much faster.
Don’t Over-Whip: While you want stiff peaks for your heavy cream, be careful not to over-whip it. Over-whipped cream can become grainy, which will affect the smooth, velvety texture of your ice cream. Stop just as it holds its shape!
My Secret Trick: When preparing the berry swirl, I always add a tiny splash of lemon juice. It truly brightens the berry flavor and prevents it from being overly sweet, giving your Fruity No-Churn Ice Cream a wonderful tang that sings on your palate.
Gentle Folding Matters: When combining the berry swirl with the cream base, remember to fold gently. You want to incorporate everything without deflating the airy whipped cream, as that air is what gives no-churn ice cream its signature light and creamy texture.
Fun Variations for Fruity No-Churn Ice Cream
One of the joys of baking is experimenting, and this Fruity No-Churn Ice Cream is a fantastic canvas for your creativity! Don’t be shy about playing with flavors.
Seasonal Swirls
Instead of mixed berries, try a single fruit! In the late summer, my friend Emily loves when I make a peach version, swirling in pureed ripe peaches with a hint of cinnamon. For autumn, a roasted apple and caramel swirl would be absolutely divine.
Chocolatey Chunks
If you’re a chocolate lover like me, consider folding in some white chocolate chips or finely chopped dark chocolate after adding the berry swirl. The contrast between the fruity sweetness and the rich chocolate is simply irresistible. This is an easy way to elevate your Fruity No-Churn Ice Cream.
Tropical Twist
For a taste of the tropics, swap out some of the mixed berries for mango or pineapple chunks, and perhaps add a hint of coconut extract to the cream base. It’s like a mini-vacation in every spoonful! My sister always asks me to swirl in a touch of passion fruit puree when I make this variation.
What to Serve With Fruity No-Churn Ice Cream
This delightful Fruity No-Churn Ice Cream is a star on its own, but sometimes a little something extra just completes the experience!
For a truly decadent treat, I love serving it with a warm, fudgy brownie. The contrast of the cool, creamy ice cream with the rich, warm chocolate is pure heaven. Another wonderful pairing is a simple shortbread cookie; its buttery crunch is a lovely complement to the smooth texture of the ice cream. My mom always pairs her desserts with a strong cup of freshly brewed coffee, and I must admit, it’s a delightful combination with this fruity delight. And for those busy evenings, a quick sprinkle of toasted shredded coconut or a few extra fresh berries on top is all you need to elevate this sweet, creamy Fruity No-Churn Ice Cream into an elegant dessert!
How to Store Fruity No-Churn Ice Cream
To keep your delicious Fruity No-Churn Ice Cream tasting as fresh and wonderful as the day you made it, proper storage is key!
Freezer Fundamentals
Once fully frozen, transfer your ice cream to an airtight container. This is crucial for preventing freezer burn and keeping it tasting creamy and delicious for up to two weeks. I always press a piece of plastic wrap directly onto the surface of the ice cream before sealing the container; it creates an extra barrier against ice crystals. This little step ensures your Fruity No-Churn Ice Cream stays perfectly scoopable and flavorful for longer.
Serving from Frozen
When you’re ready to enjoy it again, let the container sit on the counter for 5-10 minutes before scooping. This allows it to soften slightly, making it easier to serve and ensuring that velvety texture you love.
Nutritional Benefits
While we indulge in the sweet pleasure of Fruity No-Churn Ice Cream, it’s lovely to know that the mixed berries bring a wonderful boost of antioxidants and vitamins to this delightful treat. This recipe allows us to create a dessert that’s both satisfying and offers the wholesome goodness of real fruit, proving that indulgence and simple, nourishing ingredients can truly go hand-in-hand.
FAQs
Faq 1
Can I use frozen berries for the berry swirl?
Absolutely! Just be sure to thaw them first and drain any excess liquid before simmering with sugar and lemon juice. This ensures your berry swirl for the Fruity No-Churn Ice Cream has the perfect consistency and flavor.
Faq 2
How long does no-churn ice cream last in the freezer?
When stored in an airtight container, your homemade Fruity No-Churn Ice Cream will stay delicious for up to two weeks. After that, its texture and flavor might start to diminish slightly.
Faq 3
Why is my no-churn ice cream not freezing firm enough?
This usually happens if the heavy cream wasn’t whipped to stiff peaks, or if too much air was lost during folding. Ensure your cream is very cold and whipped well for firm Fruity No-Churn Ice Cream.
Faq 4
Can I make this recipe dairy-free?
Yes, you can! Substitute the heavy cream with full-fat coconut cream (chilled, solid part only) and use a dairy-free sweetened condensed milk. Your Fruity No-Churn Ice Cream will have a lovely coconut flavor.
Conclusion
And there you have it, my sweet friends – a recipe for Luscious Berry Blast No-Churn Ice Cream that brings so much joy with so little fuss! I truly hope you’ll gather your ingredients and let your kitchen fill with the promise of this vibrant, creamy treat. It’s more than just a dessert; it’s an invitation to create wonderful memories, share a smile, and savor the simple, heartfelt magic of homemade Fruity No-Churn Ice Cream. Happy scooping!