Pro Tips for Making This Biscoff Cheesecake
Achieving that perfect Biscoff Cheesecake isn’t just about following the steps; it’s about embracing a few little tricks I’ve learned over the years. These pointers will help you create a dessert that’s not only delicious but also beautifully presented.
My Secret Trick: I always chill my mixing bowl and whisk attachment for the heavy cream for at least 15 minutes before whipping. This ensures your cream whips up super light and fluffy, giving your cheesecake that ethereal, airy texture that’s simply divine.
To get that beautiful, defined cookie butter swirl, make sure your smooth Biscoff cookie butter is slightly warmed and pourable. A quick zap in the microwave for 15-20 seconds usually does the trick! Drizzle it over the cheesecake before the final chill, then use a skewer or knife to gently create those lovely patterns.
Patience is key, my friends! While it’s tempting to dive in, allowing your no-bake Biscoff cheesecake to chill for the full 6 hours (or even better, overnight) is crucial. This gives the flavors time to meld and the cheesecake to set properly, ensuring every slice is firm, creamy, and utterly irresistible.
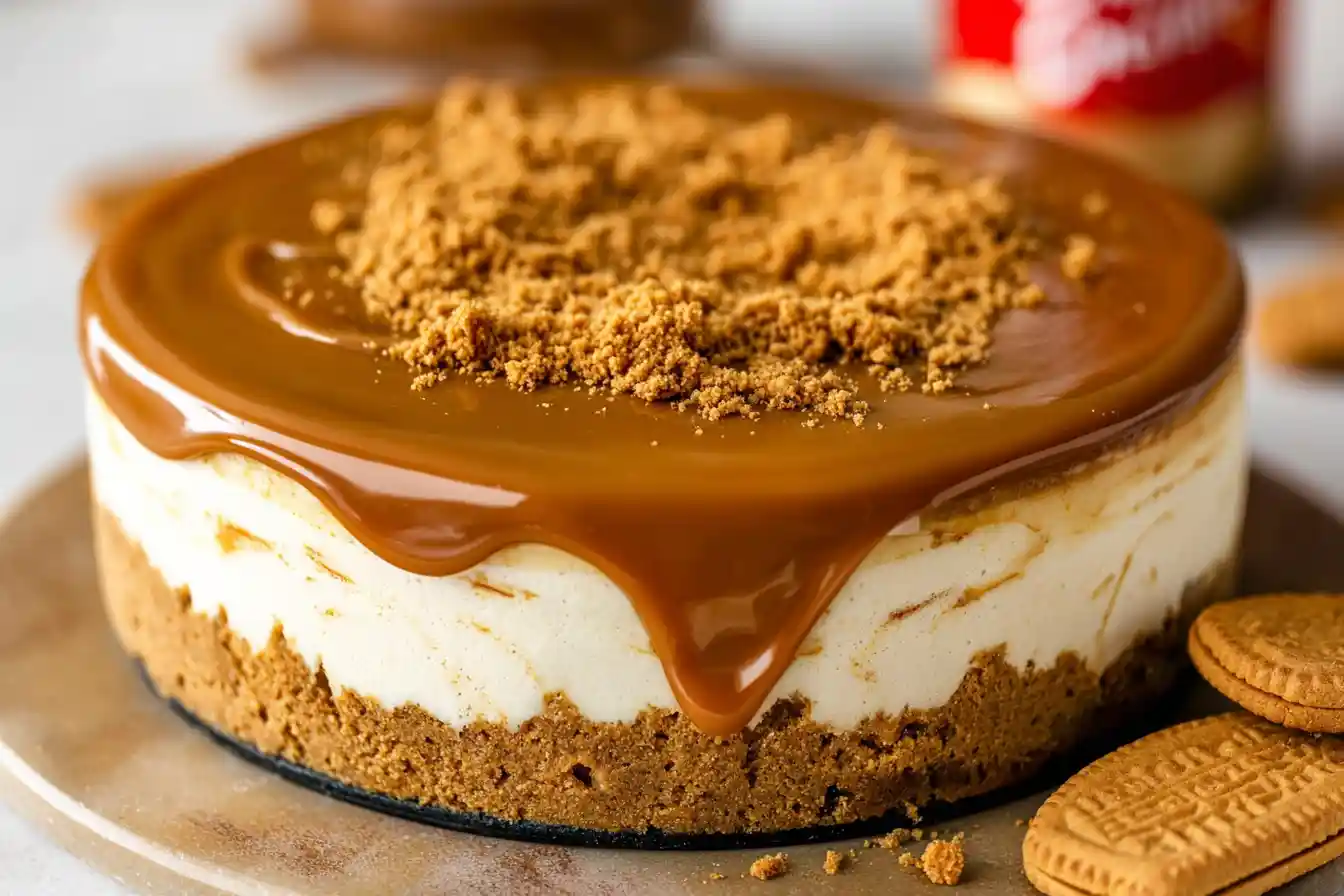
When it comes to decorating, don’t be shy! I love crushing a few extra Biscoff cookies and sprinkling them generously over the top just before serving. A drizzle of additional cookie butter, perhaps some fresh berries for a touch of brightness, or even a dusting of cocoa powder can elevate your Biscoff Cheesecake to a true masterpiece.
Decadent No-Bake Biscoff Cheesecake
Ingredients
Equipment
Method
- Lightly grease a 9-inch springform pan. If desired, line the bottom with parchment paper for easier removal.
- In a food processor, finely crush the Biscoff cookies until they resemble fine crumbs. Alternatively, place cookies in a Ziploc bag and crush with a rolling pin.
- Transfer the crushed cookie crumbs to a medium bowl. Pour in the melted unsalted butter and stir until well combined and the crumbs are moistened.
- Press the cookie mixture evenly into the bottom of the prepared springform pan. Use the back of a spoon or a flat-bottomed glass to compact it firmly. Place the crust in the refrigerator to chill while you prepare the filling.
- In a large mixing bowl, using an electric mixer, beat the softened cream cheese and granulated sugar on medium speed until smooth, creamy, and lump-free (about 2-3 minutes). Scrape down the sides of the bowl as needed.
- Add 1 cup of smooth Biscoff cookie butter and vanilla extract to the cream cheese mixture. Beat on medium speed until fully incorporated and smooth.
- In a separate clean, large mixing bowl, pour the cold heavy cream and powdered sugar. Beat on high speed with an electric mixer until stiff peaks form (about 3-5 minutes). Be careful not to overbeat, or it will curdle.
- Gently fold about one-third of the whipped cream into the cream cheese mixture to lighten it. Then, fold in the remaining whipped cream in two additions until just combined and no streaks of whipped cream remain. Do not overmix.
- Pour the cheesecake filling over the chilled Biscoff crust in the springform pan. Use a spatula to spread it evenly and smooth out the top.
- In a small microwave-safe bowl or saucepan, gently melt the remaining 1/2 cup of Biscoff cookie butter until it’s pourable (about 30-60 seconds in the microwave, stirring halfway).
- Drizzle the melted Biscoff cookie butter over the top of the cheesecake. Use a knife or a skewer to gently swirl the cookie butter into the cheesecake batter, creating decorative patterns.
- Cover the springform pan tightly with plastic wrap and refrigerate for a minimum of 6 hours, or preferably overnight, until the cheesecake is fully set.
- Once thoroughly chilled, carefully remove the springform pan sides. You can run a thin knife around the edge of the cheesecake before releasing the spring to ensure clean sides.
- Before serving, melt the additional 1/2 cup of Biscoff cookie butter for drizzle. Drizzle liberally over the top of the cheesecake.
- Crush the additional 5-6 Biscoff cookies and sprinkle them over the top of the cheesecake for extra texture and flavor.
- Slice with a hot, clean knife (wiping it between slices for best results) and serve immediately. Store any leftover cheesecake in an airtight container in the refrigerator.
Notes
Fun Variations for Biscoff Cheesecake
One of the greatest joys of baking is getting creative, and this Biscoff Cheesecake is wonderfully versatile! It’s like a blank canvas just waiting for your personal touch.
A Berry Nice Twist
My sister always asks me to swirl in a spoonful of raspberry jam alongside the cookie butter, and it’s a delightful combination! The tartness of the berries cuts through the richness beautifully. You could also try a blueberry or cherry compote for a different fruity dimension.
Chocolate Lover’s Dream
For those who adore chocolate, consider adding a layer of melted dark chocolate ganache over the crust before adding the filling. Or, for a truly decadent no-bake Biscoff cheesecake, mix in some mini chocolate chips to the filling itself. A friend loves when I top it with whipped cream and chocolate shavings!
Spiced & Nice
If you want to lean into the warm spice notes, a tiny pinch of extra cinnamon or nutmeg in the filling can really enhance the Biscoff flavor. You could even add a hint of ginger for an extra zing, especially lovely in the cooler months.
What to Serve With Biscoff Cheesecake
This gorgeous Biscoff Cheesecake is a showstopper all on its own, but sometimes a little something extra makes the experience even more delightful. Think of it as creating a complete moment, a sweet symphony for your taste buds!
I absolutely adore serving a slice of this creamy dessert with a generous scoop of vanilla bean ice cream. The cool, mellow creaminess of the ice cream is the perfect counterpoint to the spiced Biscoff notes. My mom always pairs it with a steaming mug of her homemade hot cocoa in winter – pure comfort!
For a lighter touch, fresh berries like raspberries, blueberries, or sliced strawberries are simply divine. Their natural sweetness and slight tartness provide a lovely contrast, and they add a beautiful pop of color. A simple drizzle of caramel or even a whisper of chocolate sauce can also elevate the presentation and add another layer of indulgence to this magnificent no-bake Biscoff cheesecake. And, of course, a good cup of coffee or a delicate tea always makes for a perfect companion.
How to Store Biscoff Cheesecake
Once you’ve made this delicious Biscoff Cheesecake, you’ll want to make sure it stays fresh and flavorful for as long as possible! Proper storage is key to preserving that wonderful creamy texture and spiced aroma.
Keeping it Fresh in the Fridge
Your Biscoff Cheesecake should always be stored in an airtight container in the refrigerator. This will keep it wonderfully fresh for up to 3-4 days. I like to place a piece of parchment paper directly on top of the cheesecake before sealing the container; it helps prevent any moisture from gathering and keeps it tasting just like it was freshly made.
Freezing for Later Enjoyment
Yes, you can freeze your cheesecake! For longer storage, wrap individual slices or the whole cheesecake tightly in plastic wrap, then an additional layer of aluminum foil. It will keep beautifully in the freezer for up to 1 month. When you’re ready to enjoy it, simply thaw it in the refrigerator overnight. A light dusting of powdered sugar after thawing brings it back to life!
Nutritional Benefits
While we cherish desserts for their joy and flavor, it’s wonderful to know that even a decadent treat like this can offer a little something extra! This creamy Biscoff Cheesecake, with its blend of dairy and wholesome cookies, provides a delightful indulgence that can also be a source of calcium from the cream cheese and a touch of fiber from the cookie crust. It’s a treat that’s both satisfying and nourishing in its own sweet way, aligning with my philosophy of enjoying simple, lovingly made ingredients.
FAQs
Can I use crunchy Biscoff cookie butter instead of smooth?
Absolutely! Using crunchy Biscoff cookie butter will add an extra layer of texture to your no-bake Biscoff cheesecake, with delightful little cookie bits throughout the filling. It’s a lovely variation!
Do I need to grease my springform pan?
I always recommend lightly greasing and lining the bottom of your springform pan with parchment paper. This ensures your Biscoff Cheesecake releases cleanly and beautifully, making for perfect slices every time.
How do I prevent the crust from crumbling?
To get a sturdy crust for your no-bake Biscoff cheesecake, ensure your melted butter is fully incorporated into the crushed cookies and press it down very firmly into the pan. Chilling it thoroughly before adding the filling is also crucial.
Can I make this cheesecake ahead of time?
Yes, this is an ideal make-ahead dessert! The Biscoff Cheesecake needs a minimum of 6 hours to chill, but it’s even better if made the day before you plan to serve it. This allows all the flavors to deepen beautifully.
Conclusion
And there you have it, my sweet friends – a recipe for a truly unforgettable Biscoff Cheesecake that will surely become a cherished favorite in your home. This dessert embodies everything I believe in: simple ingredients, a little bit of patience, and a whole lot of love transformed into something magical. I encourage you to gather your loved ones, bake this delightful treat, and create some beautiful, sweet memories together. Because in my kitchen, every dessert is a story, and every shared bite brings us closer. Happy baking!