Oh, sweet friends, there’s a certain magic that happens when you bring a classic glazed donut recipe to life right in your own kitchen. It’s more than just a treat; it’s an experience – the gentle warmth of the dough, the irresistible aroma as they fry, and that first bite into a tender, fluffy donut coated in a shimmering glaze. It’s pure, unadulterated comfort in every single mouthful.
I remember childhood afternoons spent in my grandmother’s kitchen, watching her deft hands work flour and yeast into something truly wondrous. The simple joy of a homemade donut, fresh from the oil and still warm, is a feeling I’ve cherished and recreated countless times, learning through every rise and every glaze. It’s those moments that inspired recipesdessert.net!
This particular donut recipe is a labor of love, but one that rewards you with the most delightfully airy donuts, perfect for a cozy weekend breakfast or a special treat to share. My top tip? Don’t rush the rising; that patience is truly the secret to their incredible fluffiness.
What You Need to Make This Recipe
Crafting these delightful donuts starts with simple, wholesome ingredients like warm milk and active dry yeast, which awaken the dough with a beautiful lightness, and pure vanilla extract for that comforting, classic flavor I always insist on. This donut recipe calls for a handful of pantry staples that magically transform into something extraordinary; you’ll find the full list and precise measurements in the recipe card just below!
How to Make Fluffy Homemade Donut Recipe
Making these fluffy delights is a journey of warmth and wonder. We’ll begin by preparing our enriched yeast dough, giving it time to develop its beautiful texture. Next, we’ll gently shape the donuts and let them rise until they’re perfectly plump and ready for their moment in the oil. After a quick swim to golden perfection, they’ll get their classic, sweet glaze, and then, my dear friends, they’re ready to bring smiles to everyone’s faces!
Classic Glazed Yeast Donut Recipe
Ingredients
Equipment
Method
- In a large mixing bowl (or stand mixer bowl), combine the warm milk, active dry yeast, and 1 teaspoon of the granulated sugar. Stir gently and let sit for 5-10 minutes, until foamy.
- Add the remaining granulated sugar, egg, melted and cooled unsalted butter, vanilla extract, and salt to the yeast mixture. Whisk until well combined.
- Gradually add the all-purpose flour, 1 cup at a time, mixing until a shaggy dough forms. If using a stand mixer, attach the dough hook and knead on low speed for 5-7 minutes, until the dough is smooth and elastic. If kneading by hand, turn the dough out onto a lightly floured surface and knead for 8-10 minutes.
- Lightly grease a clean bowl with a small amount of vegetable oil. Place the dough in the bowl, turning once to coat. Cover the bowl with plastic wrap or a clean kitchen towel and let rise in a warm place for 1-1.5 hours, or until doubled in size.
- Once the dough has doubled, gently punch it down to release the air. Turn it out onto a lightly floured surface. Roll the dough to about 1/2-inch thickness. Using a donut cutter (or a 3-inch round cutter for the donut and a 1-inch cutter for the hole), cut out the donuts. Re-roll scraps once to cut out additional donuts.
- Carefully transfer the cut donuts and donut holes to baking sheets lined with parchment paper, leaving some space between each. Cover loosely with plastic wrap or a kitchen towel and let rise for another 30-45 minutes, or until visibly puffy.
- While the donuts are rising for the second time, pour vegetable oil into a large heavy-bottomed pot or Dutch oven, ensuring it is at least 3 inches deep. Heat the oil over medium heat to 350°F (175°C). Use a deep-fry thermometer to monitor the temperature.
- Carefully slide 2-3 donuts (do not overcrowd the pot) into the hot oil using a slotted spoon or spatula. Fry for 1-2 minutes per side, until golden brown. Adjust heat as needed to maintain 350°F. Donut holes cook faster, about 30-60 seconds per side.
- Using a slotted spoon or spider, remove the fried donuts and place them on a wire rack set over a baking sheet to drain excess oil. Repeat with remaining donuts and donut holes.
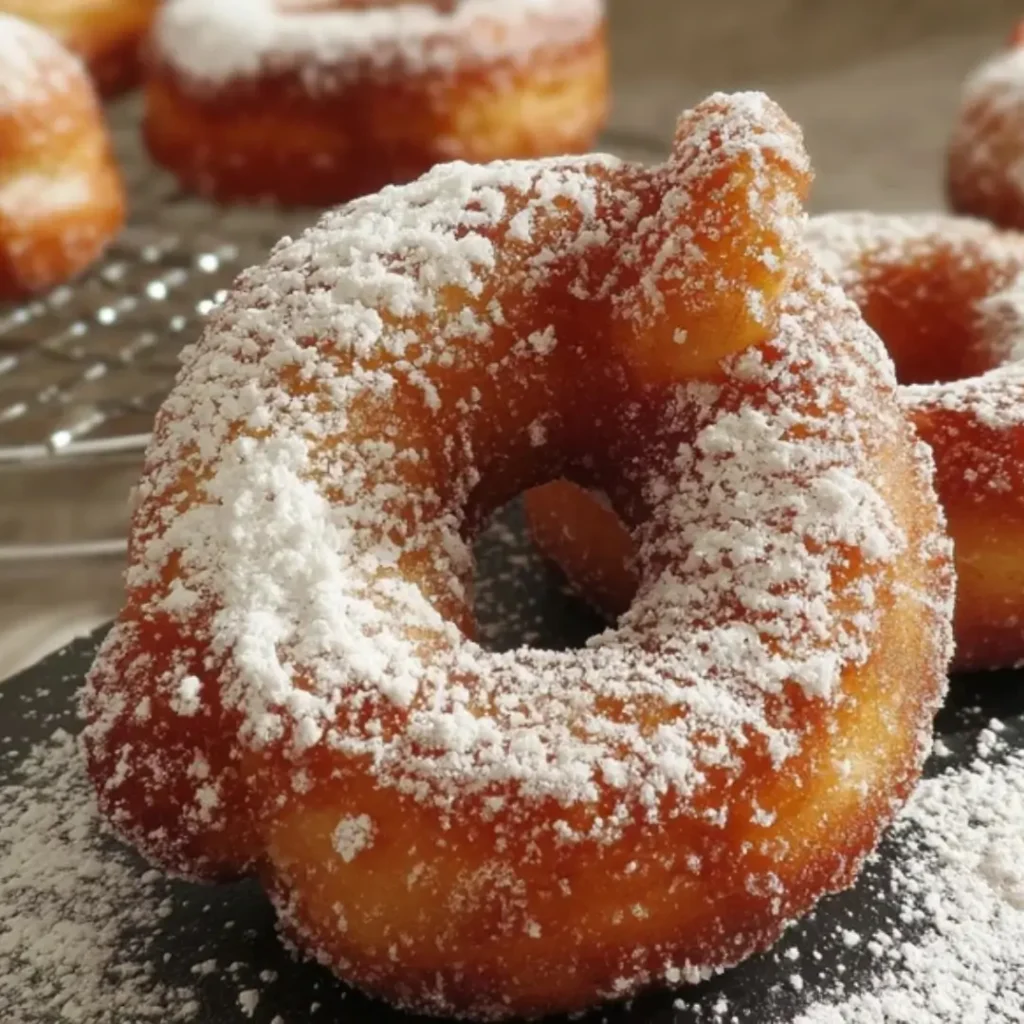
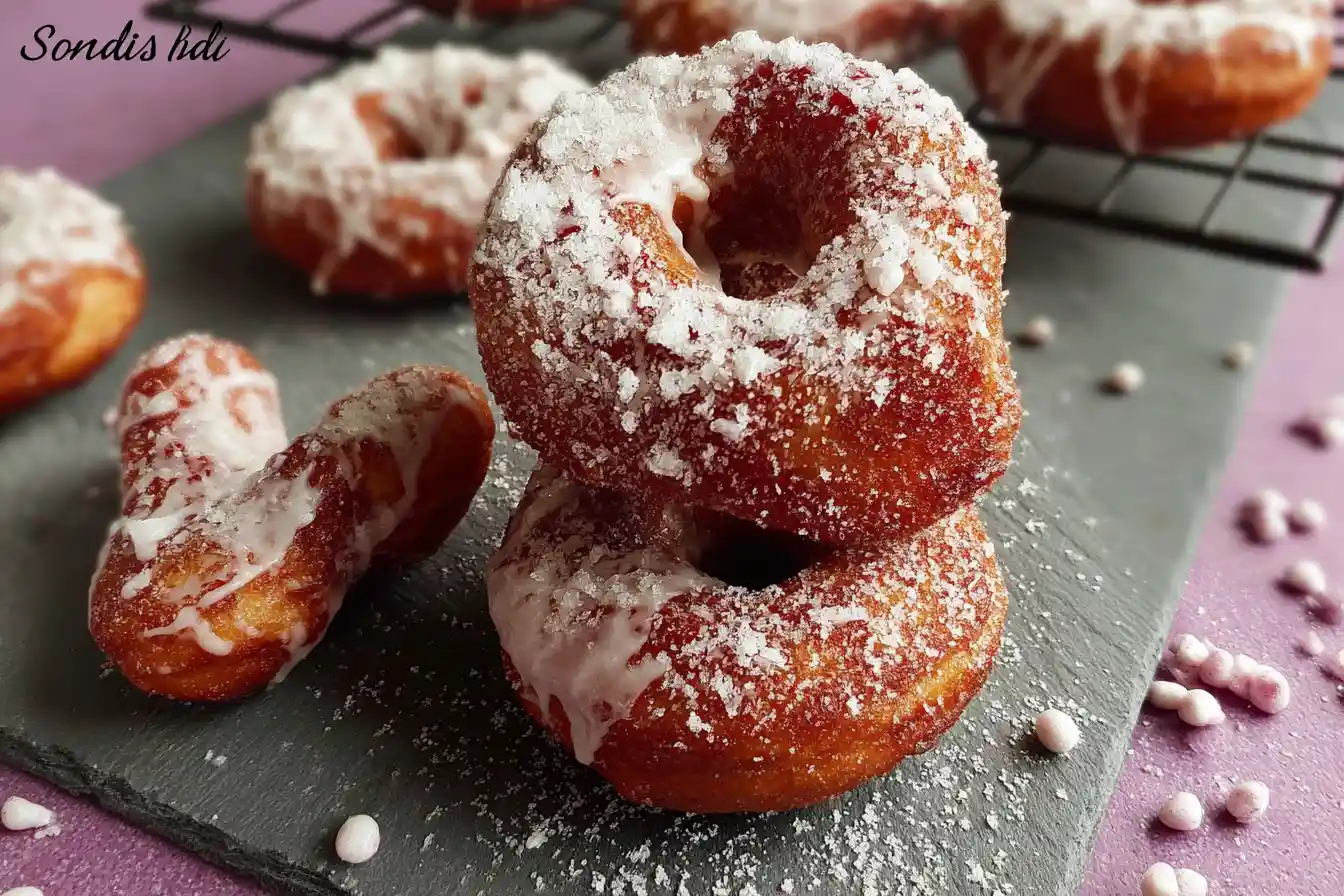
- While the donuts are still warm, prepare the glaze. In a medium bowl, whisk together the sifted powdered sugar, milk, and vanilla extract until smooth.
- Dip each warm donut into the glaze, turning to coat both sides. Place them back on the wire rack for the glaze to set. Serve immediately or once glaze is fully set.
Notes
Making homemade donuts can feel like a grand adventure, and with a few of my tried-and-true tips, your donut recipe will turn out perfectly every time.
My Secret Trick: I always make sure my milk is just the right temperature – not too hot to kill the yeast, but warm enough to activate it lovingly. Around 105-115°F (40-46°C) is ideal for that perfect, bubbly bloom. This ensures your dough rises beautifully, yielding the fluffiest donuts imaginable.
When frying, maintain a consistent oil temperature, ideally around 350°F (175°C). Too cool, and your donuts will be greasy; too hot, and they’ll brown too quickly on the outside, leaving the inside uncooked. A reliable thermometer is your best friend here!
Don’t overcrowd your frying pan! Frying a few donuts at a time allows them enough space to cook evenly and helps maintain the oil temperature. Patience is key for that golden, perfect finish.
For the glaze, dip the warm donuts immediately after frying. The warmth helps the glaze adhere beautifully and creates that classic, slightly crisp sugar shell we all adore.
Fun Variations for donut recipe
Once you’ve mastered this classic donut recipe, it’s so much fun to get creative! I often find myself experimenting, and my sister always asks me to add a little something extra.
Citrus Zest Surprise
For a bright twist, try adding the zest of one lemon or orange to your dough. It infuses a lovely, subtle citrus note that pairs beautifully with the sweet glaze. My friend loves when I do this, saying it reminds her of sunshine!
Spice It Up
A pinch of cinnamon or nutmeg added to the flour mixture can bring a delightful warmth to your donuts, making them feel even cozier and more nostalgic. It’s a simple addition that makes a big difference in flavor.
Chocolate Drizzle
After glazing, a quick drizzle of melted dark or white chocolate over the top makes for an extra decadent treat. You can even add sprinkles before the chocolate sets for a festive touch!
What to Serve With donut recipe
These fluffy homemade donuts are truly a treat on their own, but serving them with a little something extra can elevate the experience. My mom always pairs them with a steaming cup of hot cocoa during the colder months, which is such a lovely memory!
I love serving this donut recipe with a big glass of cold milk for a classic pairing that never disappoints. For those who enjoy a bit of warmth, a freshly brewed cup of coffee or a comforting herbal tea makes for a perfect accompaniment.
Sometimes, for a brunch gathering, I’ll plate them alongside fresh berries like strawberries or blueberries. The slight tartness of the fruit is a wonderful contrast to the sweet glaze, and it adds a beautiful pop of color to your dessert table.
How to Store donut recipe
To keep your delicious donut recipe tasting its best, proper storage is key. Freshly made donuts are always ideal, but if you happen to have any leftovers, here’s what I recommend.
For short-term storage, glazed donuts can be kept at room temperature in an airtight container for up to 2 days. I like to place a piece of parchment paper between layers to prevent them from sticking together. This helps maintain their soft texture and prevents the glaze from getting too sticky.
If you want to keep them longer, you can freeze unglazed fried donuts. Once cooled completely, place them in a single layer on a baking sheet and freeze until firm, then transfer to a freezer-safe bag or container. They’ll keep for up to a month. My personal tip for reheating is to warm them gently in the microwave for about 15-20 seconds before glazing – it brings back that lovely tenderness!
Nutritional Benefits
While this donut recipe is certainly an indulgence, it’s also a treat made with simple, real ingredients like milk and eggs, offering some protein and calcium. When enjoyed in moderation, it’s a delightful way to satisfy a sweet craving, embodying my philosophy that desserts can be both satisfying and nourishing for the soul.
FAQs
Can I make the donut dough ahead of time?
Yes, you can! Prepare the dough and let it have its first rise, then punch it down, cover it tightly, and refrigerate overnight. Take it out to warm up slightly before shaping for this donut recipe.
What kind of oil is best for frying donuts?
I always recommend using a neutral-flavored oil with a high smoke point, such as vegetable oil, canola oil, or sunflower oil. These oils won’t impart any unwanted flavors to your delicious donut recipe.
How do I know when my donuts are cooked through?
Donuts are typically cooked through when they are beautifully golden brown on both sides. If you’re unsure, you can carefully cut one open to check the inside after the first batch of this donut recipe.
Can I bake these donuts instead of frying them?
While technically possible, baking will result in a different texture, more akin to a cake donut. For the true fluffy, airy yeast donut recipe experience, frying is definitely the way to go!
Conclusion
There’s something incredibly rewarding about creating a classic glazed donut recipe from scratch. It’s more than just following steps; it’s about infusing love into every part of the process, from the first mix to that final, perfect glaze. I hope this recipe inspires you to embrace the joy of baking, to create not just delicious treats, but also cherished memories in your own kitchen. Happy baking, sweet friends!