There’s something truly magical about the aroma of freshly baked bread filling your home, isn’t there? This Easy Unloaf Sourdough Bread Recipe brings that comforting magic straight to your kitchen, offering a delightful way to enjoy the tangy, chewy goodness of sourdough without the fuss of a Dutch oven. It’s a rustic, beautiful loaf that promises a crisp crust and a wonderfully airy interior, making every bite a celebration.
I still remember the first time my grandmother let me help her with her bread dough, my small hands sticky with flour as she taught me the rhythm of kneading. Years later, countless experiments in my own kitchen have led me to this particular recipe – one that captures all the artisanal charm of traditional sourdough but simplifies the process, making it approachable for everyone.
This recipe is not only incredibly satisfying to bake, but it’s also wonderfully versatile, perfect for everyday enjoyment or special occasions. My top tip for any baker? Trust your senses! Feel the dough, smell the yeast, and let your intuition guide you, just like my grandmother always told me.
What You Need to Make This Recipe
Crafting this delightful Easy Unloaf Sourdough Bread Recipe relies on just a handful of simple, wholesome ingredients, transforming them into something extraordinary. You’ll need an active sourdough starter for that signature tangy flavor, warm water to awaken the yeast, all-purpose flour for structure, and fine sea salt to enhance every bite. These humble components, when brought together with a little love, create a truly satisfying loaf. For the full list of ingredients and precise measurements, please see the recipe card below.
How to Make Easy Unloaf Sourdough Bread Recipe
Baking this Easy Unloaf Sourdough Bread Recipe is a journey of patience and simple steps, beginning with mixing your dough until it’s just right. After a relaxing bulk fermentation for the first rise, you’ll gently shape your unloaf and allow it to proof for its second rise. Finally, it’s time to bake your beautiful creation until it’s golden brown and fragrant, ready to fill your home with a truly irresistible aroma.
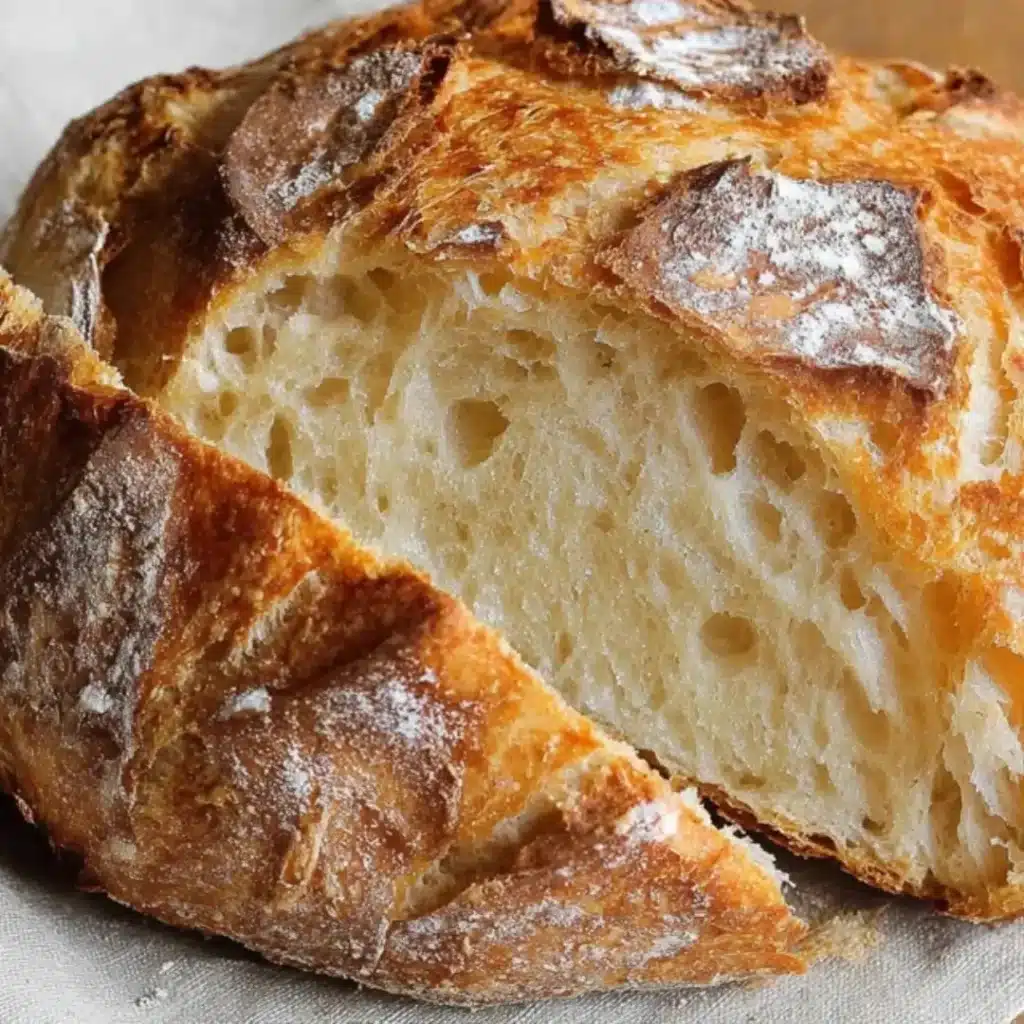
![A close-up of a golden, crusty loaf of homemade {{ $('Fetch Recipe Data').first().json["Main Keyword"] }} resting on a simple linen cloth.](https://recipesdessert.net/wp-content/uploads/2026/01/easy-unloaf-sourdough-bread-recipe.webp)
Easy Unloaf Sourdough Bread Recipe
Ingredients
Equipment
Method
- In a large mixing bowl, combine the active sourdough starter and warm water. Stir gently with a spatula or your hand until the starter is mostly dissolved into the water.
- Add the flour and salt to the bowl. Mix with your hand or a sturdy spatula until no dry flour remains and a shaggy dough forms. Do not knead. Just ensure everything is incorporated.
- Cover the bowl with a lid or plastic wrap and let it rest at room temperature for 30 minutes (autolyse/first rest).
- After 30 minutes, perform your first set of ‘stretch and folds’. With wet hands, gently grab a portion of the dough from the edge, stretch it upwards, and fold it over to the center. Rotate the bowl and repeat this 3-4 times until you’ve gone all the way around.
- Cover the bowl and let it rest for another 30-45 minutes. Repeat the ‘stretch and fold’ process 2-3 more times, with 30-45 minute intervals between each set. You’ll notice the dough becoming smoother and more elastic with each set.
- After the last set of stretch and folds, cover the bowl and let the dough continue its bulk fermentation at room temperature (around 70-75°F / 21-24°C) for 8-12 hours, or until it has visibly increased in size by 50-75% and shows good signs of activity (some bubbles, domed top). The exact time will depend on your starter’s strength and room temperature.
- Lightly flour your work surface. Gently tip the dough out onto the floured surface. Using a dough scraper, gently shape the dough into a rustic round or oval. This isn’t about perfection; just gather it into a cohesive shape. The ‘unloaf’ aspect means less stress on perfect shaping.
- Prepare your banneton or a bowl lined with a floured cloth (rice flour works best to prevent sticking). Carefully transfer the dough, seam-side up, into the prepared banneton/bowl.
- Cover the banneton/bowl with plastic wrap or a shower cap and refrigerate for 2-12 hours (cold proof). This slows down fermentation, develops flavor, and makes the dough easier to handle.
- Approximately 45 minutes before you’re ready to bake, place your Dutch oven with its lid into your oven. Preheat the oven to 450°F (232°C).
- Once the oven and Dutch oven are fully preheated, carefully remove the hot Dutch oven. Gently invert the cold dough from the banneton onto a piece of parchment paper. If desired, lightly score the top of the dough with a sharp knife or razor blade (lame).
- Using the parchment paper as a sling, carefully lower the dough into the hot Dutch oven. Place the lid back on.
- Bake with the lid on for 30 minutes.
- After 30 minutes, remove the lid from the Dutch oven and continue baking for another 15-20 minutes, or until the crust is a deep golden brown and the internal temperature reaches 200-210°F (93-99°C).
- Carefully remove the bread from the Dutch oven and transfer it to a wire rack to cool completely for at least 1-2 hours before slicing. This is crucial for the crumb to set properly.
Notes
Room Temperature: Ideal room temperature for bulk fermentation is 70-75°F (21-24°C). If your kitchen is cooler, fermentation will take longer; if warmer, it will be faster. Look for visual cues rather than strictly adhering to times.
Storage: Store leftover bread at room temperature in a paper bag or a bread box for 2-3 days. For longer storage, slice and freeze for up to a month, toasting slices as needed.
Pro Tips for Making This Easy Unloaf Sourdough Bread Recipe
Getting that perfect Easy Unloaf Sourdough Bread Recipe every time is about more than just following steps; it’s about understanding the dough and listening to what it needs. Here are a few things I’ve learned over the years that truly make a difference.
My Secret Trick: I always pay close attention to the feel of the dough during the mix. It should be shaggy at first, then come together into a soft, slightly sticky mass that’s still manageable. If it feels too dry, add water in tiny increments; too wet, a touch more flour. This intuition comes with practice!
When it comes to bulk fermentation, don’t rush it. The dough needs time to develop flavor and strength. I usually look for it to have visibly increased in size by about 50-75% and show small bubbles on the surface, which tells me the starter is truly active and happy.
For shaping, be gentle. You want to create tension on the surface of the dough without tearing it. Think of it like coaxing the dough into a tight little package. This helps create a beautiful, open crumb in your finished Easy Unloaf Sourdough Bread Recipe.
And finally, always preheat your oven thoroughly. A hot oven helps the bread spring up beautifully, creating that gorgeous, crisp crust we all adore. I often let my oven preheat for 20-30 minutes after it reaches the target temperature.
Fun Variations for Easy Unloaf Sourdough Bread Recipe
Part of the joy of baking this Easy Unloaf Sourdough Bread Recipe is making it your own! It’s truly a blank canvas for your creativity, and I love seeing how friends adapt it. Here are a few ideas to spark your imagination:
Herb & Garlic Infusion
My friend Clara absolutely adores it when I add fresh rosemary and minced garlic to the dough. Just toss about 2 tablespoons of finely chopped fresh herbs (rosemary, thyme, or oregano work wonderfully) and 2 cloves of minced garlic during the initial mixing stage. It gives the bread an incredible savory aroma and flavor, perfect for pairing with soups.
Cheesy Swirl
For a truly decadent treat, swirl in a cup of your favorite shredded cheese (cheddar or Gruyère are fantastic) after the first rise, just before shaping. It creates pockets of melted cheese throughout the loaf that are simply irresistible. My nephew asks for this version every single time!
Whole Wheat Goodness
If you’re looking for a slightly heartier loaf, try substituting up to 1 cup of the all-purpose flour with whole wheat flour. It will give your Easy Unloaf Sourdough Bread Recipe a deeper, nuttier flavor and a more robust texture. Remember, whole wheat flour absorbs more liquid, so you might need to add a tiny splash more water.
What to Serve With Easy Unloaf Sourdough Bread Recipe
This beautiful Easy Unloaf Sourdough Bread Recipe is so versatile, it shines in countless ways! Whether it’s the star of a simple meal or a delicious accompaniment, it always brings warmth to the table.
I love serving warm slices with a generous knob of good quality butter and a sprinkle of flaky sea salt – it’s a pure, unadulterated pleasure. For a more substantial pairing, it’s absolutely divine alongside a hearty bowl of tomato soup, perfect for dipping and soaking up every last drop.
You could also turn it into the base for elegant bruschetta, topped with fresh tomatoes, basil, and a drizzle of balsamic glaze. My mom always keeps a loaf on hand to make incredible grilled cheese sandwiches or to serve with a simple cheese board for impromptu gatherings. And for a quick breakfast, a toasted slice with avocado and a sprinkle of chili flakes is simply heavenly!
How to Store Easy Unloaf Sourdough Bread Recipe
Keeping your homemade Easy Unloaf Sourdough Bread Recipe fresh is key to enjoying its deliciousness for days. Proper storage ensures that crisp crust and tender crumb last as long as possible.
Room Temperature Storage
Once cooled completely, I like to store my unloaf in a clean linen bread bag or wrapped in a tea towel at room temperature. This allows the crust to breathe while keeping the interior relatively soft. It will stay wonderfully fresh for 2-3 days this way. Avoid airtight plastic containers immediately after baking, as they can soften the crust too much.
Freezer Friendly
For longer storage, sliced or whole, this Easy Unloaf Sourdough Bread Recipe freezes beautifully. Wrap it tightly in plastic wrap, then an additional layer of aluminum foil, and place it in the freezer for up to 2-3 months. To enjoy, simply thaw at room temperature, and for that “fresh from the oven” feel, I often pop slices into the toaster or warm the whole loaf in a preheated oven for about 10-15 minutes at 350°F (175°C). A light mist of water before reheating can work wonders!
Nutritional Benefits
This Easy Unloaf Sourdough Bread Recipe isn’t just a treat for your taste buds; it offers some wonderful benefits too! Sourdough’s fermentation process helps break down starches, potentially making the bread easier to digest. Made with simple, natural ingredients like all-purpose flour and active sourdough starter, it’s a satisfying staple that can provide sustained energy as part of a balanced diet, showing that a homemade treat can be both comforting and wholesome.
FAQs
Faq 1
What is an “unloaf” of sourdough bread?
An unloaf refers to sourdough bread baked without a Dutch oven, often shaped freeform on a baking sheet. This Easy Unloaf Sourdough Bread Recipe focuses on achieving that delicious crust and open crumb with a simpler method, perfect for home bakers.
Faq 2
How do I know if my sourdough starter is active enough?
An active sourdough starter should double in size within 4-8 hours after feeding, be bubbly throughout, and pass the float test (a small spoonful floats in water). An active starter is crucial for this Easy Unloaf Sourdough Bread Recipe.
Faq 3
Can I use bread flour instead of all-purpose flour?
Yes, you can use bread flour for this Easy Unloaf Sourdough Bread Recipe. Bread flour has a higher protein content, which can result in a chewier crumb and a slightly more open structure. You might need a tiny bit more water, as it absorbs more liquid.
Faq 4
Why is my sourdough bread dense?
Density in sourdough often comes from insufficient bulk fermentation, an inactive starter, or improper shaping. Ensure your starter is robust, give your Easy Unloaf Sourdough Bread Recipe dough ample time to rise, and practice gentle, effective shaping for a lighter texture.
Conclusion
There’s truly nothing quite like the satisfaction of pulling a warm, golden loaf of homemade Easy Unloaf Sourdough Bread Recipe from your oven. This recipe, born from simple ingredients and a dash of patience, brings that artisanal bakery charm right into your kitchen without the fuss. It’s a testament to the joy of creating with your own hands, filling your home with an aroma that instantly evokes comfort and happiness. So go ahead, embrace the journey, let your hands get a little floury, and make some delicious memories with this wonderful sourdough. Happy baking, sweet friends!