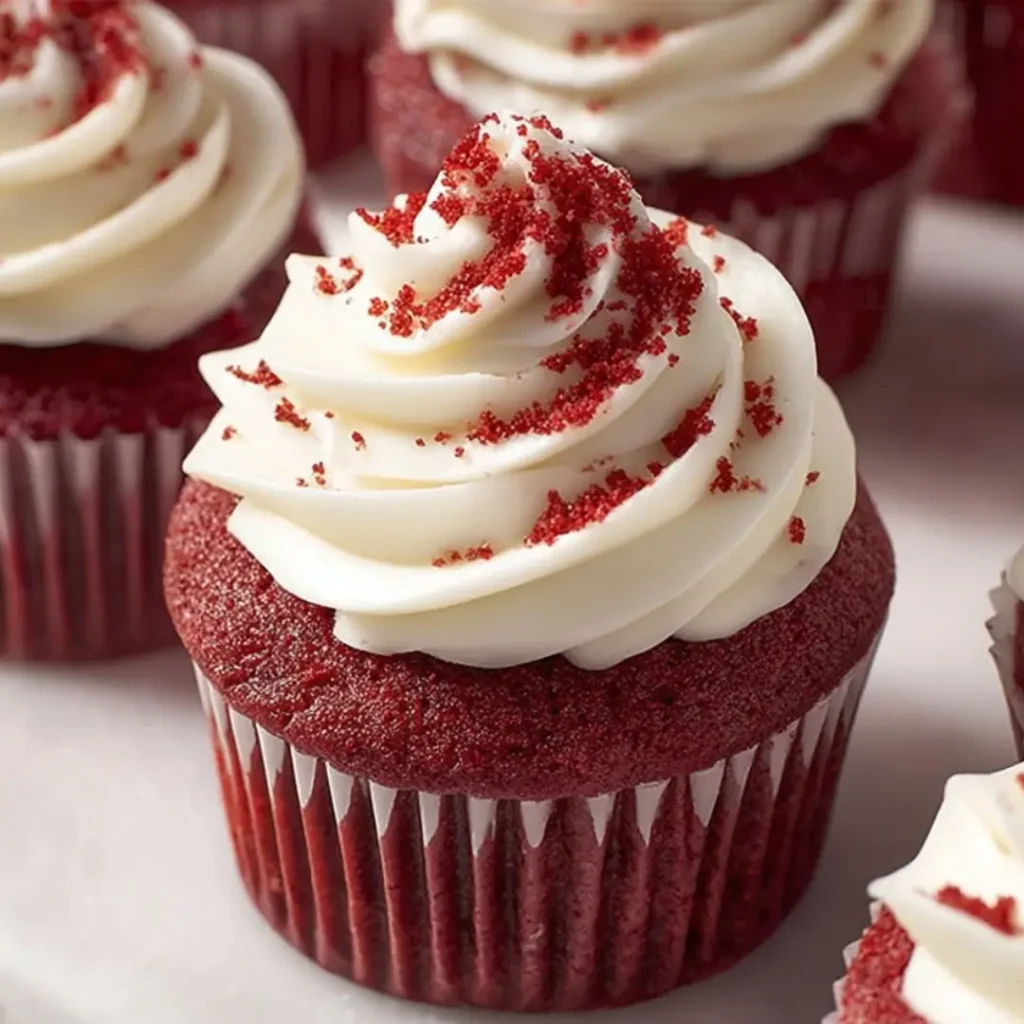
Oh, dear friends, there’s just something utterly magical about a batch of red velvet cupcakes, isn’t there? That deep, rich color, the tender crumb, and that irresistible hint of cocoa, all crowned with a swirl of tangy cream cheese frosting – it’s a symphony of flavors that truly warms the heart. They embody everything I love about baking: a touch of elegance, a burst of joy, and a whole lot of homemade love.
I remember countless afternoons in my grandmother’s kitchen, where the scent of vanilla and sugar was a constant, comforting embrace. While red velvet wasn’t one of her traditional recipes, it became a beloved project for me. I spent hours experimenting, trying to get that perfect balance of flavor and that signature hue, often sharing my sweet triumphs (and sometimes, comical failures!) with family and friends who were always happy to be taste-testers.
This recipe for classic red velvet cupcakes is truly a gem, perfect for celebrating special moments or simply adding a little sparkle to an ordinary day. It’s incredibly approachable, making it a fantastic baking project for both seasoned bakers and eager beginners. My best tip? Always bake with a smile – it’s the secret ingredient!
What You Need to Make This Recipe
Crafting these delightful treats begins with simple pantry staples, transformed by a little love and careful mixing. The combination of unsweetened cocoa powder with a hint of red gel food coloring gives these red velvet cupcakes their signature deep hue, while buttermilk and vinegar ensure a wonderfully tender and moist crumb. Of course, the creamy, tangy frosting, made with cream cheese and real butter, is the perfect crown. You’ll find the full list of ingredients and measurements waiting for you in the recipe card below.
How to Make Classic Red Velvet Cupcakes
Baking these gorgeous red velvet cupcakes is a joyful journey from simple ingredients to a show-stopping dessert. We’ll start by gently preparing our tender, cocoa-kissed cupcake batter, then bake them until they’re perfectly springy and fragrant. While they cool, we’ll whip up that irresistible, tangy cream cheese frosting. Finally, the fun part: assembling and decorating each cupcake with a generous swirl, making them ready to delight.
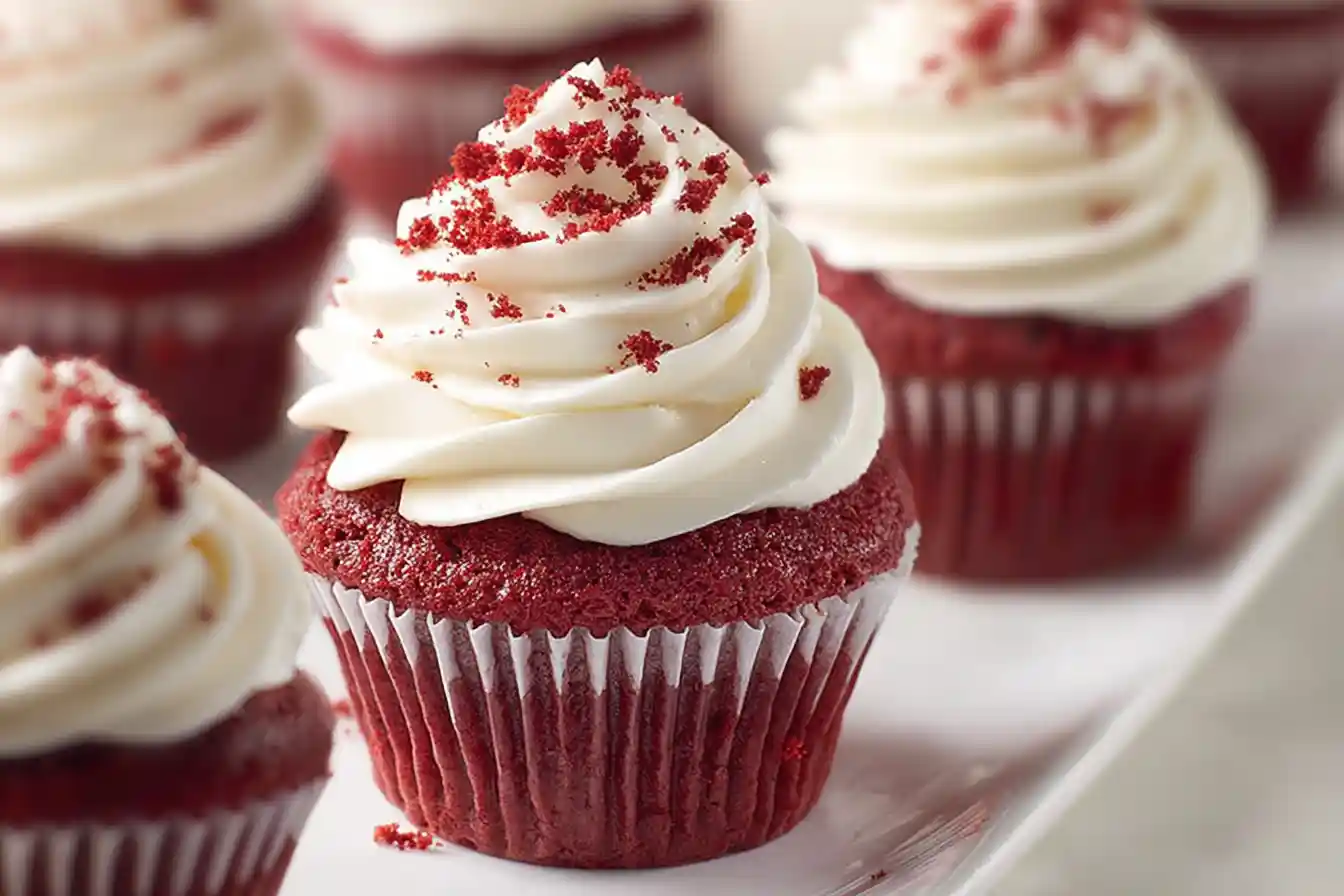
Classic Red Velvet Cupcakes with Tangy Cream Cheese Frosting
Ingredients
Equipment
Method
- Preheat your oven to 350°F (175°C). Line a 12-cup muffin tin with paper liners.
- In a large bowl, whisk together the all-purpose flour, granulated sugar, cocoa powder, baking soda, and salt until well combined.
- In a separate medium bowl, whisk together the buttermilk, vegetable oil, egg, white vinegar, vanilla extract, and red gel food coloring until the color is uniform and vibrant.
- Pour the wet ingredients into the dry ingredients. Mix on low speed with an electric mixer, or by hand with a spatula, until just combined and no streaks of flour remain. Be careful not to overmix.
- Divide the batter evenly among the 12 prepared cupcake liners, filling each about two-thirds full.
- Bake for 18-20 minutes, or until a wooden skewer or toothpick inserted into the center of a cupcake comes out clean. Avoid overbaking to keep them moist.
- Remove the muffin tin from the oven and let the cupcakes cool in the tin for 5 minutes before transferring them to a wire rack to cool completely. Cupcakes must be fully cooled before frosting.
- In a large bowl with an electric mixer, beat the softened cream cheese and softened unsalted butter together on medium speed until smooth and creamy, about 2-3 minutes. Scrape down the sides of the bowl as needed.
- Gradually add the sifted powdered sugar, 1 cup at a time, beating on low speed until incorporated, then increasing to medium speed. Continue until all sugar is added and the frosting is smooth.
- Add the vanilla extract and a pinch of salt. Beat on medium-high speed for 1-2 minutes until the frosting is light and fluffy.
- Once the cupcakes are completely cool, frost them generously using an offset spatula or by piping the frosting with a piping bag and your favorite tip.
- Serve immediately or store for later.
Notes
Pro Tips for Making This Red Velvet Cupcakes
Achieving bakery-quality red velvet cupcakes at home is absolutely within your reach, and I’ve picked up a few tricks over the years that I’m thrilled to share!
First, ensure all your cold ingredients, like buttermilk, eggs, cream cheese, and butter, are at room temperature. This makes for a much smoother batter and frosting, ensuring everything emulsifies beautifully for that perfect texture.
My Secret Trick: I always sift my unsweetened cocoa powder along with the flour. This prevents any lumps and ensures the cocoa is evenly distributed, giving your red velvet cupcakes that uniform, subtle chocolate flavor and deep color without any gritty bits.
When adding your red gel food coloring, start with a smaller amount and gradually add more until you achieve your desired vibrant red hue. Remember, it’s easier to add more color than to take it away!
Lastly, for that truly fluffy, pipeable cream cheese frosting, make sure your butter and cream cheese are softened but still slightly cool to the touch. This helps prevent the frosting from becoming too soft or runny, especially if your kitchen is warm.
Fun Variations for Red Velvet Cupcakes
One of the most delightful aspects of home baking is the freedom to get creative and put your own spin on a classic, and these red velvet cupcakes are no exception! I love how a small change can completely transform the experience.
For a delightful twist, consider adding a handful of mini chocolate chips to the batter before baking. My sister always asks me to swirl in a spoonful of raspberry jam into the batter right before baking; the tart fruit complements the red velvet perfectly!
You could also play with extracts. While vanilla is classic, a touch of almond extract alongside the vanilla can add a subtle, sophisticated note. Or, for a truly decadent treat, try infusing the cream cheese frosting with a hint of orange zest – a friend loves when I do this for her special occasions!
And if you’re making these for a festive occasion, don’t be shy with sprinkles! A sprinkle of festive colors can turn these into instant party favorites, just as delightful for holiday gatherings as they are for a casual get-together.
What to Serve With Red Velvet Cupcakes
These charming red velvet cupcakes are a delightful treat all on their own, but pairing them with the right accompaniments can elevate the entire dessert experience. Think of it as creating a little moment of bliss!
I absolutely adore serving them with a steaming mug of hot cocoa, especially on a chilly evening. The warmth and extra chocolatey richness are just heavenly. My mom always pairs them with hot cocoa in winter, a tradition I’ve carried on.
Another wonderful option is a scoop of good quality vanilla bean ice cream. The cool, creamy ice cream melting alongside the tender cupcake is a textural dream. For a lighter touch, fresh raspberries or sliced strawberries provide a lovely tart contrast that brightens the rich flavors of the cupcake and frosting.
And of course, for the adults, a freshly brewed cup of coffee or a delicate cup of black tea makes a sophisticated pairing, cutting through the sweetness and highlighting the subtle cocoa notes.
How to Store Red Velvet Cupcakes
To ensure your delicious red velvet cupcakes stay as fresh and delightful as the day they were baked, proper storage is key! Because of their tangy cream cheese frosting, these beauties need a little extra care.
For short-term storage, up to 2-3 days, I always recommend keeping them in an airtight container in the refrigerator. This keeps the frosting firm and prevents the cupcakes from drying out. Just make sure they are completely cooled before storing to avoid condensation.
If you’ve managed to bake a larger batch or want to enjoy them later, red velvet cupcakes freeze beautifully! Place them in an airtight container or wrap each cupcake individually in plastic wrap, then aluminum foil, and store them in the freezer for up to 2-3 months. When you’re ready to enjoy them, simply thaw them in the refrigerator overnight and then bring them to room temperature before serving for the best texture and flavor. My personal tip for serving after refrigeration is to let them sit out for 30 minutes to an hour; this brings the cupcake and frosting to the perfect soft, creamy consistency.
Nutritional Benefits
While these red velvet cupcakes are undeniably a sweet indulgence, they also offer a moment of joy that nourishes the soul! Made with simple ingredients like flour and eggs, they provide a comforting treat. The cocoa powder adds a touch of antioxidants, making them a delightful dessert that’s both satisfying and a special occasion.
FAQs
Faq 1
Why is buttermilk so important in red velvet cupcakes?
Buttermilk is a star ingredient, reacting with the baking soda and cocoa powder to give red velvet cupcakes their signature tender crumb and distinctive tangy flavor. It also helps to activate the red color in the cocoa, enhancing the vibrant hue.
Faq 2
Can I make red velvet cupcakes without red food coloring?
Absolutely! While red food coloring creates the iconic vibrant hue, you can skip it entirely. The cupcakes will have a lovely deep cocoa color and the same delicious, tangy flavor. They’ll just be “velvet cupcakes” instead of “red velvet cupcakes.”
Faq 3
How can I prevent my cream cheese frosting from being too runny?
Ensure your cream cheese and unsalted butter are softened but still slightly cool, not warm. Over-beating can also incorporate too much air, making it less stable. If it’s too soft, chill it in the fridge for 15-20 minutes before whipping again.
Faq 4
What’s the best way to get evenly sized red velvet cupcakes?
For consistent size and even baking, I always recommend using an ice cream scoop or a measuring cup to portion your batter into the cupcake liners. This ensures each red velvet cupcake bakes uniformly and looks beautiful when frosted.
Conclusion
Baking these classic red velvet cupcakes is more than just following a recipe; it’s about creating moments of happiness, sharing love, and bringing people together around something truly delicious. With that tender, moist crumb and the irresistible tang of cream cheese frosting, these cupcakes are sure to become a cherished favorite in your kitchen, just as they are in mine. So, gather your ingredients, put on your apron, and let’s bake some sweet memories that will last a lifetime!