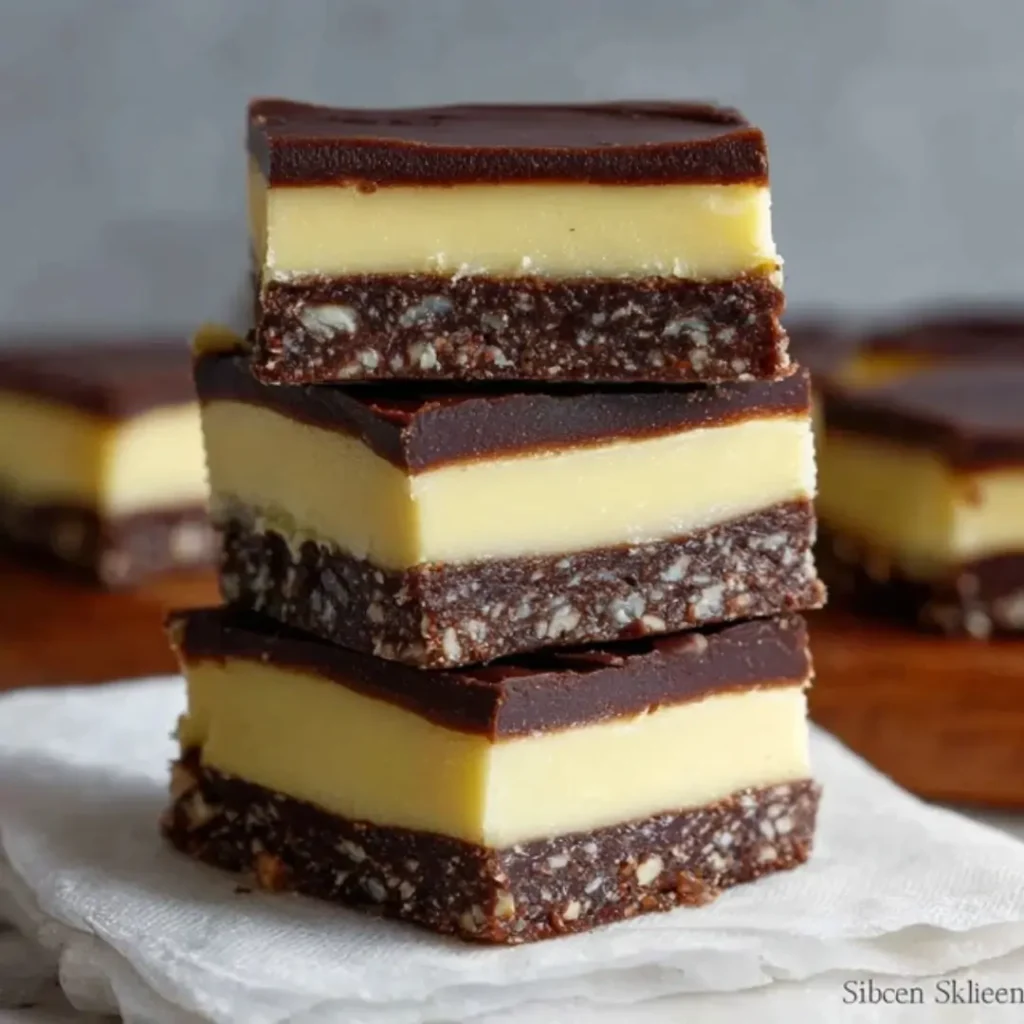
Oh, sweet friends, there’s something truly magical about a classic no-bake dessert, isn’t there? Today, we’re whisking up a batch of glorious Nanaimo Bars, a treat that perfectly balances a rich, chocolatey coconut-pecan base with a dreamy, smooth custard buttercream filling, all crowned with a snappy layer of chocolate ganache. Each bite is a symphony of textures and flavors – a true testament to simple ingredients coming together to create something extraordinary.
I remember countless childhood afternoons in Grandma’s kitchen, watching her effortlessly layer different flavors. While Nanaimo Bars weren’t a regular on her menu, the spirit of creating something beautiful and comforting from scratch, just like these bars, was always present. It’s that same joyful, experimental energy that I bring to every recipe I share, learning and growing with each sweet triumph and occasional kitchen mishap!
This particular recipe is a dream come true because it’s wonderfully straightforward and no-bake, making it perfect for a delightful afternoon project or a last-minute gathering. You’ll find that with a little patience and a lot of love, these Nanaimo Bars are incredibly rewarding to make and even more delightful to share. My best advice? Don’t rush the chilling process – good things come to those who wait!
What You Need to Make This Recipe
Crafting these delightful no-bake bars relies on a few key players, like rich unsalted butter and quality unsweetened cocoa powder for that deep chocolatey base, alongside graham cracker crumbs, shredded coconut, and pecans for texture. The star of the show, the custard powder, creates that iconic creamy yellow filling, while semi-sweet chocolate and a touch more butter make for a shiny, crackly topping. The full list with precise measurements for these wonderful Nanaimo Bars awaits you in the recipe card below.
How to Make Nanaimo Bars
Whipping up these delightful Nanaimo Bars is a journey of three simple layers, each building on the last to create a harmonious whole. First, we create a rich, chewy base from graham cracker crumbs, cocoa, coconut, and pecans, pressing it firmly into the pan to chill. Next comes the luscious, buttery custard filling, whisked to creamy perfection and spread evenly. Finally, a shiny layer of melted chocolate forms the top, setting everything in place for a truly irresistible treat.

Classic No-Bake Nanaimo Bars
Ingredients
Equipment
Method
- Line an 8×8 or 9×9 inch baking pan with parchment paper, leaving an overhang on two sides for easy removal. Set aside.
- In a medium saucepan over low to medium heat, melt the 1/2 cup butter with granulated sugar and cocoa powder, stirring constantly until smooth. Do not let it boil. Remove from heat.
- Gradually whisk in the lightly beaten egg into the warm chocolate mixture, stirring quickly to prevent the egg from scrambling. Return to low heat for 1-2 minutes, stirring constantly until the mixture thickens slightly. Remove from heat and stir in 1 tsp vanilla extract.
- In a large mixing bowl, combine the graham cracker crumbs, shredded coconut, and chopped pecans (if using). Pour the warm chocolate mixture over the dry ingredients and mix well until everything is evenly coated.
- Press the mixture firmly and evenly into the prepared baking pan. Use the back of a spoon or your hands. Refrigerate for at least 30-60 minutes to set.
- In a large mixing bowl, using an electric mixer, beat the 1/2 cup softened butter until creamy.
- Gradually add the sifted powdered sugar, custard powder, 2 tbsp heavy cream, and 1 tsp vanilla extract. Beat on low speed until combined, then increase to medium-high and beat until light, fluffy, and smooth, about 3-5 minutes. Scrape down the sides of the bowl as needed.
- Spread the custard filling evenly over the chilled base layer. Return the pan to the refrigerator for at least 60 minutes, or until the filling is firm to the touch.
- In a small microwave-safe bowl, combine the chopped semi-sweet chocolate and 2 tbsp unsalted butter. Microwave on high in 30-second intervals, stirring after each, until melted and smooth. Be careful not to overheat.
- Let the chocolate topping cool slightly, about 5-10 minutes, so it’s warm but not hot. Pour it over the chilled custard layer and spread evenly with a spatula. If the custard is very cold, the chocolate may set quickly.
- Return the pan to the refrigerator for at least 40-60 minutes, or until the chocolate topping is completely set. For easier cutting, you can score the chocolate with a warm knife after about 15-20 minutes of chilling, then chill fully.
- Once completely set, use the parchment paper overhang to lift the entire bar out of the pan. Place on a cutting board and cut into squares or rectangles using a sharp knife dipped in hot water and wiped clean between each cut.
Notes
Making these Nanaimo Bars is a joyous process, and I’ve picked up a few little tricks over the years to ensure they turn out perfectly every single time.
My Secret Trick: I always make sure my unsalted butter for the base layer is truly softened, almost spreadable, but not melted. This helps it combine beautifully with the dry ingredients, ensuring a tender yet firm base that doesn’t crumble when you cut into it. A little extra care here makes all the difference!
When you’re pressing the base into the pan, really put some muscle into it! A firm, even layer is key for the structure of your Nanaimo Bars. I like to use the back of a measuring cup or a flat-bottomed glass to get it perfectly smooth and compact.
For the custard filling, ensure your powdered sugar and custard powder are well sifted. There’s nothing worse than lumps in that silky-smooth layer! Whisk them together thoroughly before adding the liquids to ensure a lump-free, dreamy filling.
Finally, patience is your best friend when it comes to chilling. Each layer needs adequate time in the refrigerator to set up properly before the next is added. Rushing this step can lead to messy layers. I promise, the wait is absolutely worth it for beautifully structured Nanaimo Bars.
Fun Variations for Nanaimo Bars
One of the things I adore most about baking is the freedom to play and experiment, turning a beloved classic into something new! These Nanaimo Bars are wonderfully adaptable, inviting you to put your own creative spin on them.
Citrus Zest Twist
For a bright and zesty touch, try adding a teaspoon of finely grated orange or lemon zest to the custard filling. It cuts through the sweetness beautifully and offers a delightful pop of freshness. My friend Eleanor absolutely adores the lemon version!
Nutty Alternatives
If pecans aren’t your favorite, feel free to swap them out! Toasted walnuts or almonds would be equally delicious in the base, adding a different depth of flavor and crunch to your Nanaimo Bars.
### Espresso Infusion
For coffee lovers, a teaspoon of instant espresso powder dissolved in a tiny bit of hot water and added to the chocolate topping creates a rich, sophisticated mocha flavor. It’s a subtle but impactful change that truly elevates the experience.
What to Serve With Nanaimo Bars
These rich, sweet Nanaimo Bars are absolutely divine on their own, but a few simple accompaniments can truly elevate the experience, turning a simple treat into a memorable moment.
I love serving them alongside a steaming cup of freshly brewed coffee or a classic Earl Grey tea. The slight bitterness of the coffee or the bergamot notes in the tea create a wonderful contrast with the sweetness of the bars. My mom always says a good cuppa makes any dessert taste even better!
For a touch of freshness, a small bowl of fresh raspberries or sliced strawberries provides a lovely tart counterpoint to the creamy sweetness of the bars. The vibrant color and juicy burst are simply delightful. You could even add a tiny dollop of unsweetened whipped cream for an extra layer of decadence.
How to Store Nanaimo Bars
Proper storage is key to keeping your delicious Nanaimo Bars tasting as fresh and wonderful as the day you made them! Since they contain a creamy custard filling, refrigeration is a must to maintain their texture and prevent spoilage.
Fridge Storage
Once your Nanaimo Bars are completely set and cut, store them in an airtight container in the refrigerator. This will keep them fresh and firm for up to 5-7 days. I always recommend placing a piece of parchment paper between layers if you’re stacking them, to prevent sticking and keep them looking pristine.
Freezer Tips
These bars also freeze beautifully! Once cut, arrange them in a single layer on a baking sheet and freeze until firm, about 1-2 hours. Then, transfer them to an airtight freezer-safe container or a heavy-duty freezer bag, again separating layers with parchment paper. They’ll keep wonderfully in the freezer for up to 2-3 months. Just let them thaw in the refrigerator before serving. A quick tip from my kitchen: I like to let frozen Nanaimo Bars sit at room temperature for about 15 minutes before serving for the best texture.
Nutritional Benefits
While these delightful Nanaimo Bars are certainly a treat, they do offer a few wholesome elements! The pecans in the base provide healthy fats and a good dose of fiber, while the unsweetened cocoa powder contributes antioxidants. It’s a lovely example of how a homemade dessert can offer both indulgence and a touch of goodness, balancing joy with simple, quality ingredients.
FAQs
Faq 1
Can I make Nanaimo Bars ahead of time?
Absolutely! These are a fantastic make-ahead dessert. You can prepare them up to 3-4 days in advance and store them in an airtight container in the refrigerator. This even allows the flavors to meld beautifully.
Faq 2
Why is my Nanaimo Bars filling runny?
A runny filling usually means the butter wasn’t soft enough or the mixture wasn’t beaten long enough. Ensure your butter is truly softened to room temperature and whip the ingredients until light, fluffy, and well combined before chilling.
Faq 3
What is custard powder?
Custard powder is a cornstarch-based thickening agent, often flavored with vanilla and colored yellow, used to make custards and other creamy desserts. It’s essential for the authentic flavor and texture of these Nanaimo Bars.
Faq 4
Can I freeze Nanaimo Bars?
Yes, these bars freeze exceptionally well! Cut them into individual squares, then freeze in an airtight container for up to 2-3 months. Thaw in the refrigerator before enjoying these delightful Nanaimo Bars.
Conclusion
There’s something so comforting and deeply satisfying about creating a sweet treat from scratch, especially when it’s as iconic and utterly delicious as these Classic Nanaimo Bars. With their irresistible layers of chocolatey goodness, creamy custard, and snappy ganache, they’re sure to bring smiles to everyone lucky enough to try them. I truly hope this recipe inspires you to embrace the joy of baking, to create not just a dessert, but sweet memories with every slice. So tie on your apron, gather your ingredients, and let’s make some magic in the kitchen together!