This Marshmallow Whip Cheesecake is the kind of dreamy, cloud-like dessert that makes you close your eyes on the first bite. No oven required, no complicated steps — just a silky, marshmallow-infused cheesecake filling piled high on a buttery graham cracker crust. Trust me, you’re going to love how fluffy, sweet, and irresistibly creamy this one turns out. It’s a no-bake beauty that’s perfect for birthdays, holidays, or when you just need something extra special (without breaking a sweat).
Why You’ll Love This Recipe
- No-Bake Magic: Forget the oven! This dessert sets beautifully in the fridge.
- Light & Fluffy: Marshmallow fluff and whipped cream make it airy yet indulgent.
- Crowd-Pleaser: Sweet, creamy, and just the right amount of richness.
- Easy Elegance: Looks fancy but is secretly simple — your new go-to make-ahead treat.
Ingredients
Here’s what you’ll need to whip up this dreamy cheesecake:
- Graham Cracker Crumbs: Forms that buttery, crunchy base.
- Unsalted Butter: Helps bind the crust and adds rich flavor.
- Cream Cheese: The creamy foundation of the filling.
- Vanilla Extract: Brings warm, aromatic sweetness.
- Powdered Sugar: Adds sweetness while keeping the texture smooth.
- Marshmallow Fluff: The star — makes the filling light, fluffy, and unique.
- Heavy Whipping Cream: Whipped to soft peaks for airy volume.
- Optional Garnish: Fresh berries or cocoa powder to dress it up.
👉 Note: Full ingredient list with measurements is in the recipe card below.
How to Make the Marshmallow Whip Cheesecake
Step 1: Build the Crust
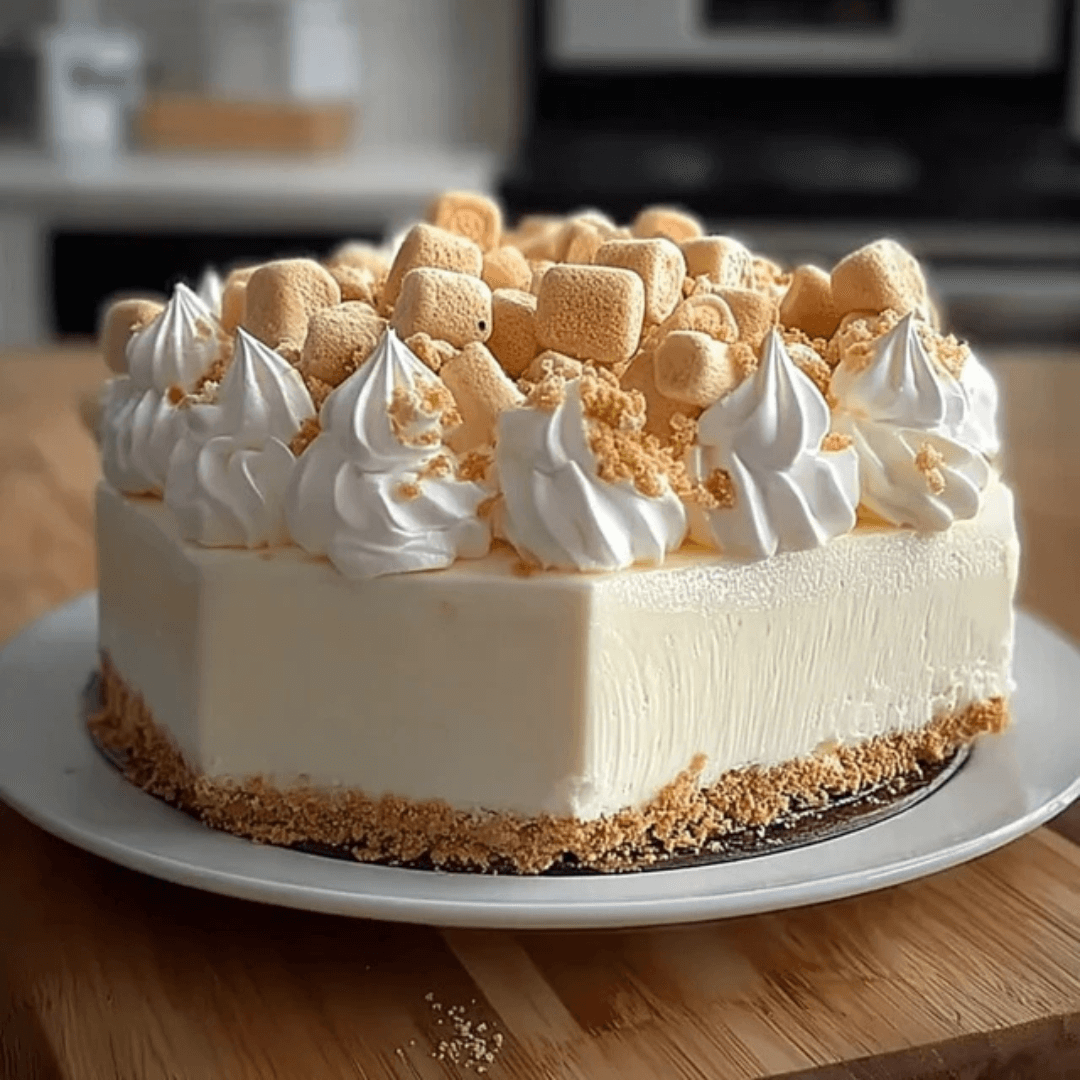
Mix graham cracker crumbs with melted butter until the texture resembles wet sand. Press firmly into a springform pan to create the base, then chill.
Step 2: Make the Creamy Filling
Beat cream cheese and vanilla until silky smooth. Add powdered sugar gradually, then blend in marshmallow fluff until everything is light and dreamy.
Step 3: Whip It Up
Whip heavy cream in a separate bowl until stiff peaks form. Gently fold into the cream cheese mixture to keep it airy and fluffy.
Step 4: Assemble & Chill
Spread the filling evenly over the crust. Refrigerate for at least 4 hours (overnight if you can wait!) until the cheesecake is set.
Step 5: Garnish & Serve
Before serving, release from the pan and finish with fresh berries or a sprinkle of cocoa powder. Slice, serve, and swoon.
Pro Tips for Making the Recipe
- Chill the Bowl: For perfect whipped cream, use a cold bowl and whisk.
- Don’t Rush the Chill: Overnight chilling gives the best texture.
- Smooth Finish: Run a hot knife around the cheesecake before releasing from the pan for clean edges.
- Switch the Base: Try chocolate cookies or digestive biscuits for a fun twist.
How to Serve
- Classic Style: With a handful of fresh berries on top.
- Extra Indulgent: Drizzle with chocolate or caramel sauce.
- Mini Versions: Serve in cups or jars for party-perfect portions.
Make Ahead and Storage
Storing Leftovers
Keep in an airtight container in the fridge for up to 4 days.
Freezing
Freeze slices individually (wrapped tightly) for up to 2 months. Thaw overnight in the fridge before serving.
Reheating
No reheating needed — this beauty is best served chilled!
FAQs
1. Can I make this cheesecake without marshmallow fluff?
Yes, but it won’t have the same light, fluffy texture. You can swap in extra whipped cream, though the flavor will be slightly different.
2. Can I use a store-bought crust?
Absolutely! A premade graham cracker crust saves even more time.
3. How do I prevent the filling from being too soft?
Make sure to whip the cream until stiff peaks form and chill the cheesecake long enough (overnight is best).
4. Can I add flavors to the filling?
Definitely! A splash of lemon juice, melted chocolate, or almond extract can give this cheesecake a fun twist.
Marshmallow Whip Cheesecake – No‑Bake Dream Dessert
Ingredients
Equipment
Method
- In a bowl, mix graham cracker crumbs, sugar, and melted butter until combined. Press firmly into the bottom (and slightly up sides) of a 9‑inch pan. Chill while preparing filling.
- In a large bowl, beat softened cream cheese and powdered sugar until smooth.
- Add marshmallow fluff and vanilla extract; mix until well combined.
- In a separate bowl, whip heavy cream to stiff peaks; gently fold into cream cheese mixture until light and airy.
- Spread filling over chilled crust. Cover and refrigerate for at least 4 hours or overnight to set.
- For topping: blend additional marshmallow fluff with whipped cream to create a marshmallow whipped topping. Spread over set cheesecake and garnish with mini marshmallows and crushed graham crackers.
- Chill an additional 1‑2 hours, slice, and serve chilled.