Creating perfect Biscuit Cinnamon Rolls is all about those little touches that elevate a good recipe to a truly fantastic one. Here are some of my go-to tips I’ve gathered over the years to ensure yours turn out beautifully every time.
- When preparing your cinnamon filling, make sure your butter is truly softened to room temperature, not melted. This makes it much easier to spread evenly over the dough, ensuring every roll gets a generous swirl of that spiced goodness.
- Don’t be afraid to be generous with your cinnamon filling! I always make sure the mixture covers the entire surface of the biscuit dough before rolling. This guarantees a rich, flavorful swirl in every single bite of your Biscuit Cinnamon Rolls.
- My Secret Trick: For an extra gooey center, I always drizzle a tiny bit of heavy cream over the assembled rolls just before they go into the oven. It creates a wonderfully moist and tender crumb that’s absolutely irresistible.
- Allow your rolls to cool for just a few minutes after baking before you add the glaze. If they’re too hot, the glaze will simply melt and run off, but a slightly cooled roll allows that creamy vanilla glaze to set perfectly, creating a luscious topping.
Fun Variations for Biscuit Cinnamon Rolls
One of the things I love most about baking is the freedom to get creative, and these Biscuit Cinnamon Rolls are a wonderful canvas for flavor experiments! My sister always asks me to swirl in raspberry jam sometimes, and it’s a delightful change. Here are a few ideas to inspire your own kitchen adventures:
Zesty Orange Swirl
For a bright, refreshing twist, add a teaspoon of orange zest to your cinnamon filling. The citrusy notes beautifully complement the warm spice, creating a sunny version of your favorite treat.
Nutty Delight
If you adore a bit of crunch, finely chop some pecans or walnuts and sprinkle them over the cinnamon filling before rolling. It adds a wonderful texture and a rich, earthy flavor to your Biscuit Cinnamon Rolls.
Chocolatey Indulgence
My friend loves when I sneak in a little chocolate! Try scattering a handful of mini chocolate chips over the cinnamon filling. They’ll melt into gooey pockets of chocolate bliss as the rolls bake, making for an extra decadent treat.
What to Serve With Biscuit Cinnamon Rolls
These delightful Biscuit Cinnamon Rolls are a treat all on their own, but they truly shine when paired with the right accompaniments, making any moment feel a little more special. I love serving them with a simple glass of cold milk, which perfectly balances their sweetness.
For a cozy morning, a steaming mug of coffee or a comforting cup of tea is just the ticket – my mom always says it’s the ideal pairing. If you’re looking to elevate them for a dessert, a scoop of creamy vanilla bean ice cream melting gently over a warm roll is pure heaven. And for a lighter touch, a side of fresh berries adds a lovely burst of color and tartness that brightens the entire experience.
How to Store Biscuit Cinnamon Rolls
After all the joy of baking and sharing your delicious Biscuit Cinnamon Rolls, it’s always good to know how to keep any leftovers fresh and delightful. I always like to ensure my baked goods stay as moist and flavorful as the day they were made!
Fridge Storage
Once your cinnamon rolls have cooled completely, place them in an airtight container. They will stay fresh in the refrigerator for up to 3-4 days. When you’re ready for another treat, a quick warm-up in the microwave for 15-20 seconds or a few minutes in a low oven (around 250°F or 120°C) will bring them back to their soft, gooey glory.
Freezer Friendly
For longer storage, you can freeze unglazed rolls. Once completely cooled, wrap each roll individually in plastic wrap, then place them in a freezer-safe bag or container. They can be frozen for up to 1 month. Thaw them overnight in the refrigerator, then warm them and add freshly made glaze.
Nutritional Benefits
While these Biscuit Cinnamon Rolls are undoubtedly a comforting treat, they also offer a little more than just sweet satisfaction. The dairy from the cream cheese and milk in our glaze provides a touch of calcium and protein, while the hint of cinnamon adds antioxidants. It’s a wonderful example of how even a delicious dessert can be a satisfying and nourishing indulgence when made with care and simple, wholesome ingredients.
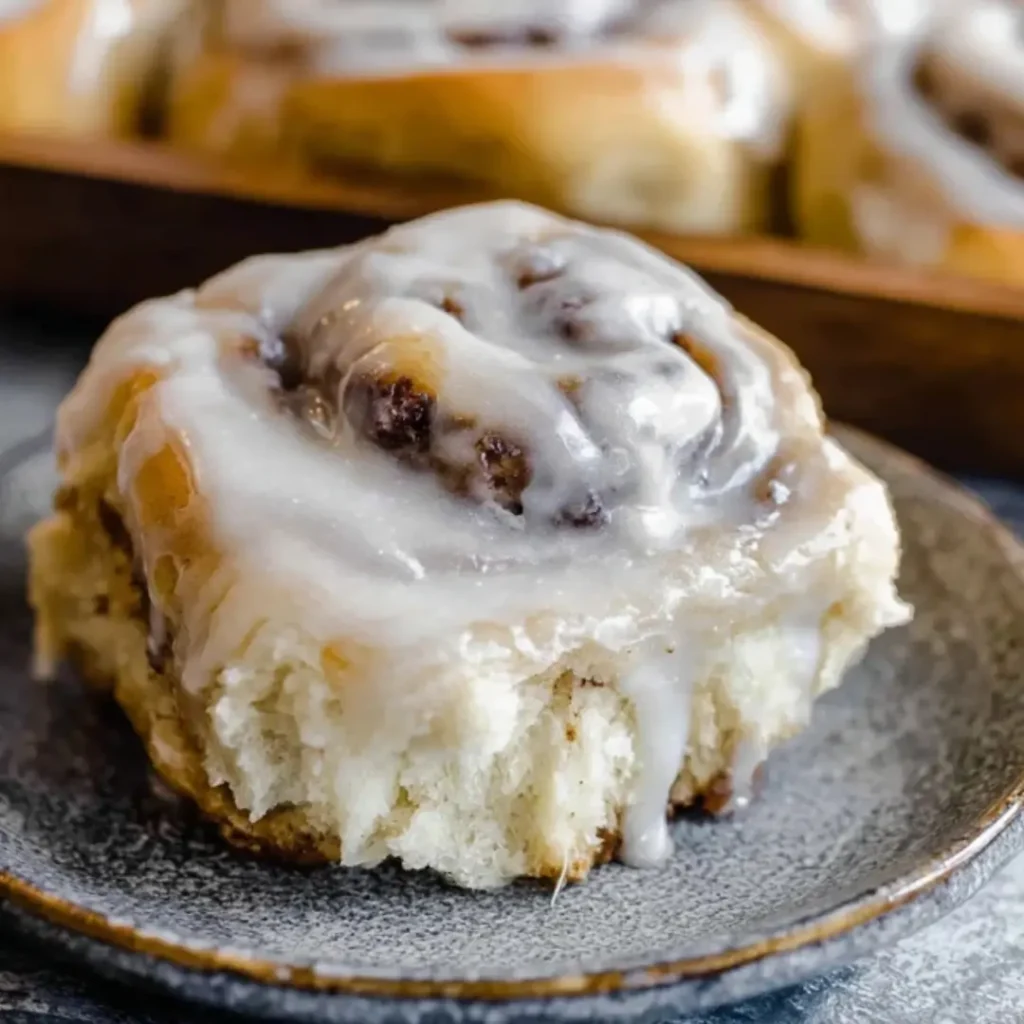
![A close-up of delicious {{ $('Fetch Recipe Data').first().json["Main Keyword"] }} with icing, served on a rustic gray plate and wooden board.](https://recipesdessert.net/wp-content/uploads/2026/02/biscuit-cinnamon-rolls.webp)
Quick & Easy Biscuit Cinnamon Rolls
Ingredients
Equipment
Method
- Preheat your oven to 375°F (190°C). Lightly grease a 9×13 inch baking dish.
- Open the cans of biscuit dough. On a lightly floured surface, take each biscuit and gently roll it out into a rectangle, approximately 6×4 inches. Overlap the edges slightly if needed to create a larger, more uniform surface.
- Brush each rolled-out biscuit rectangle with about 1 teaspoon of the melted butter, ensuring an even coating.
- In a small bowl, combine the brown sugar and ground cinnamon. Mix well.
- Evenly sprinkle the cinnamon-sugar mixture over the buttered biscuit rectangles, leaving a small border around the edges.
- Starting from one of the longer sides, carefully roll each biscuit rectangle into a tight log. Pinch the seam closed to seal.
- Using a sharp knife, slice each log into 3 equal pieces (approximately 1.5 to 2 inches thick). You should have a total of 16 rolls.
- Arrange the sliced rolls in the prepared baking dish, leaving a little space between each roll as they will expand while baking.
- Bake for 18-22 minutes, or until the rolls are golden brown and cooked through. Keep an eye on them to prevent over-browning.
- While the rolls are baking, prepare the glaze.
- In a medium bowl, beat together the softened cream cheese and softened butter until smooth and creamy.
- Gradually add the powdered sugar, mixing until fully incorporated. Stir in the vanilla extract.
- Add milk (1 tablespoon at a time) until the glaze reaches your desired consistency – smooth, pourable, but not too thin.
- Once the biscuit cinnamon rolls are out of the oven, let them cool in the baking dish for about 5-10 minutes.
- Drizzle generously with the prepared cream cheese glaze while they are still warm. Serve immediately and enjoy!
Notes
FAQs
Faq 1
Can I prepare the biscuit cinnamon rolls ahead of time?
Yes, you can! Assemble the rolls, cover them tightly, and refrigerate overnight. In the morning, let them sit at room temperature for 30 minutes before baking as directed. This makes for easy morning deliciousness.
Faq 2
What kind of biscuit dough works best?
I recommend using large, flaky refrigerated biscuit dough for the best results. The larger size makes for more substantial Biscuit Cinnamon Rolls, and the flaky layers contribute to a wonderfully tender texture once baked.
Faq 3
Can I make my own cream cheese glaze from scratch?
Absolutely! The recipe includes instructions for a simple homemade cream cheese glaze that is incredibly easy and adds a truly fresh, tangy sweetness to your Biscuit Cinnamon Rolls. It’s worth the extra minute!
Faq 4
How do I know when the cinnamon rolls are fully baked?
Your cinnamon rolls are perfectly baked when they are golden brown on top and feel set to the touch. A toothpick inserted into the center should come out mostly clean. Don’t overbake, or they might lose their delightful gooeyness.
Conclusion
Baking these Biscuit Cinnamon Rolls is more than just following a recipe; it’s about creating moments, sharing warmth, and infusing your home with the sweet magic of homemade goodness. From the first swirl of cinnamon to the final drizzle of vanilla glaze, this recipe is designed to bring joy and ease to your kitchen. I hope you’ll gather your loved ones, bake a batch (or two!), and create some beautiful new memories around these comforting treats. Happy baking, sweet friends!